
Installing the Card
Follow the instructions on the following pages to install the RAID card in your Mac Pro.
Note:
The instructions vary slightly depending on whether you are installing the RAID
card in a quad-core or 8-core Mac Pro. For help identifying your computer, see “Which
Mac Pro Do You Have?” on page 3.
WARNING:
Always shut down the Mac Pro and disconnect the power cord before
opening it to avoid damaging its internal components or the components you are
installing. Don’t open the Mac Pro while it is turned on. Even after you shut down the
Mac Pro, its internal components can be very hot. Let it cool before you open it.
Screwdriver
Wrench
Replacement screws (2)
English
5
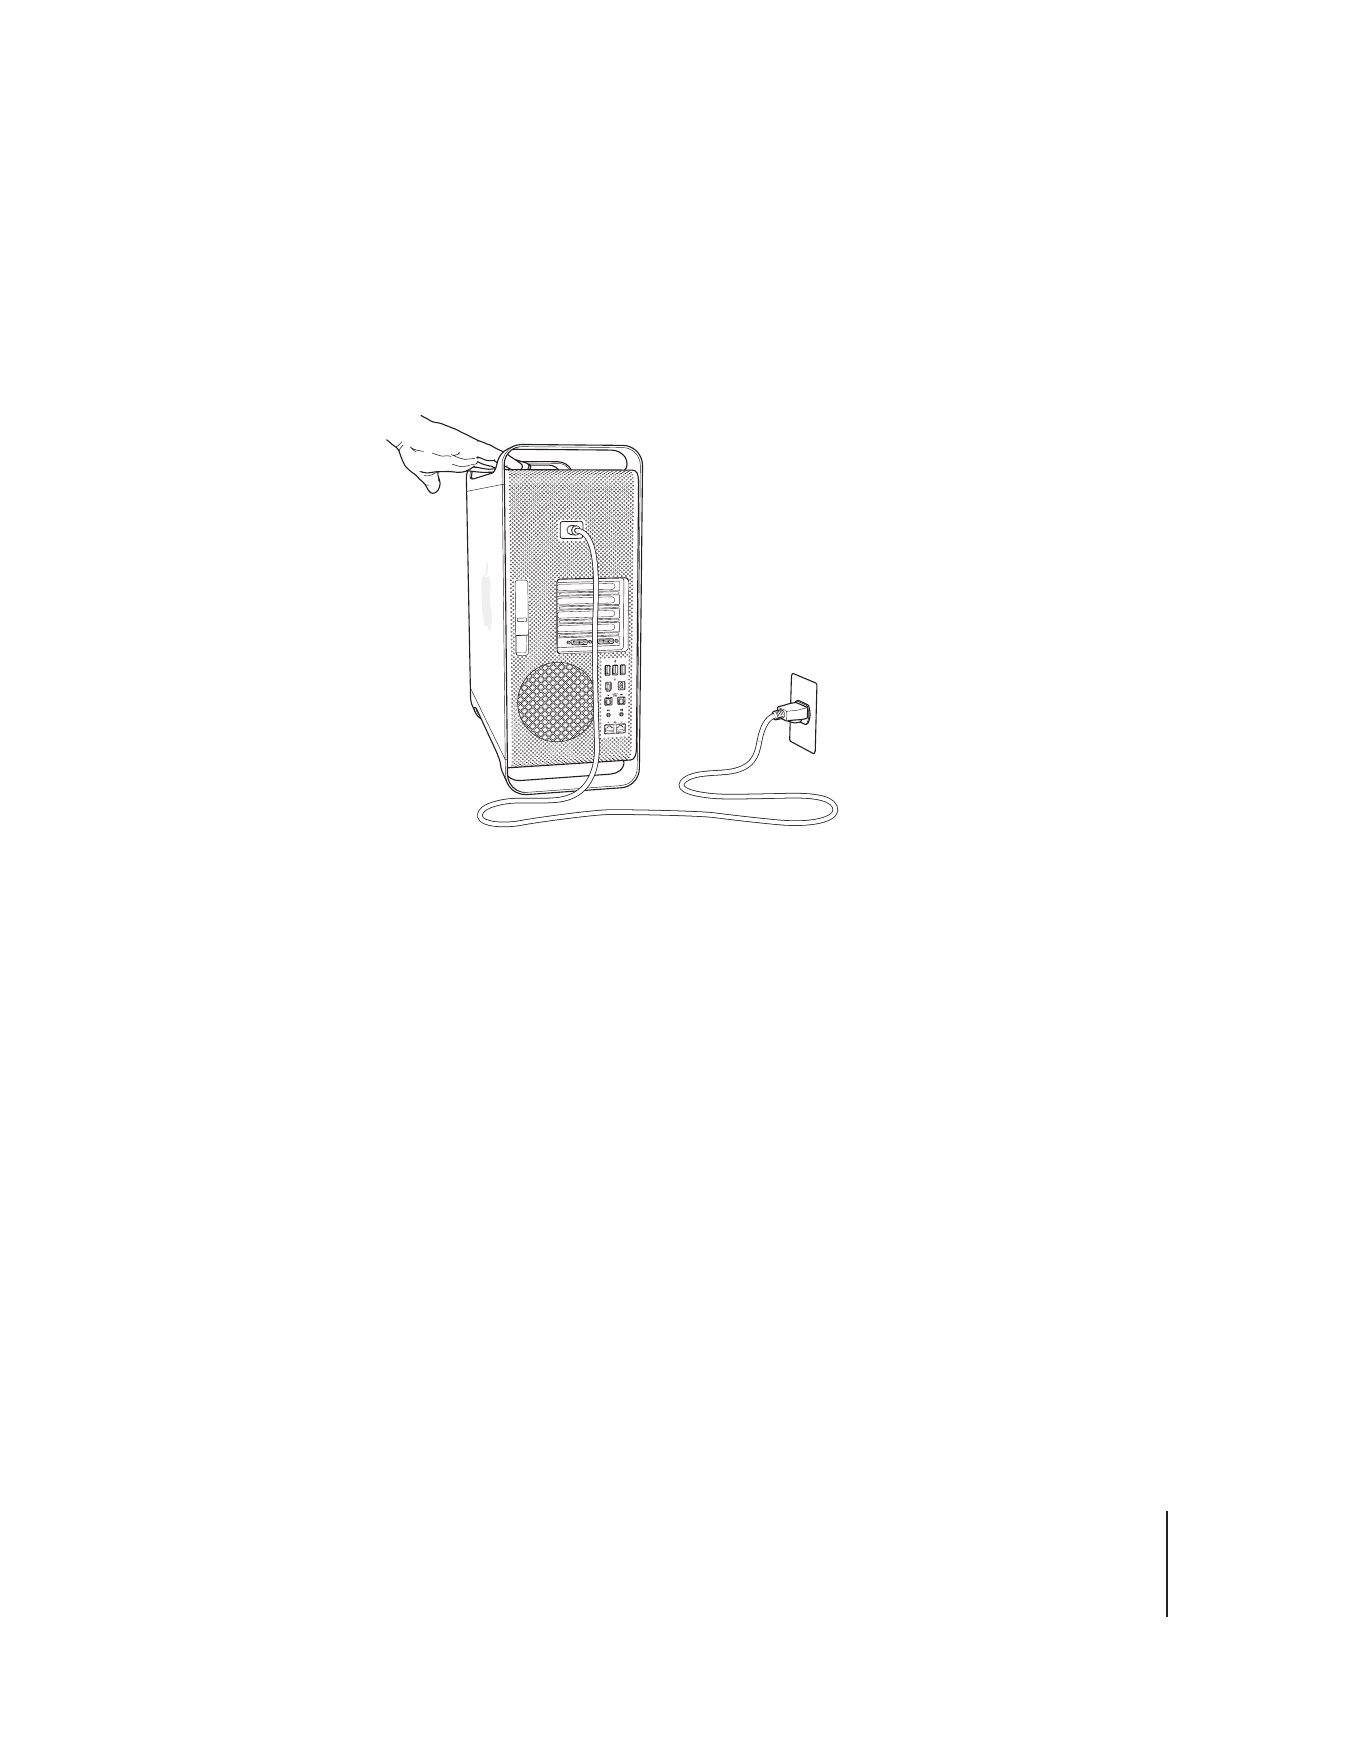
Step 1:
Shut down and unplug your Mac Pro
1
Shut down your Mac Pro by choosing Apple > Shut Down, and then wait a few minutes
to let the internal components cool.
2
Touch the metal on the outside of your Mac Pro while it’s still plugged in to discharge
any static electricity from your body.
3
Unplug the power cord and disconnect all cables from the computer.
6
English
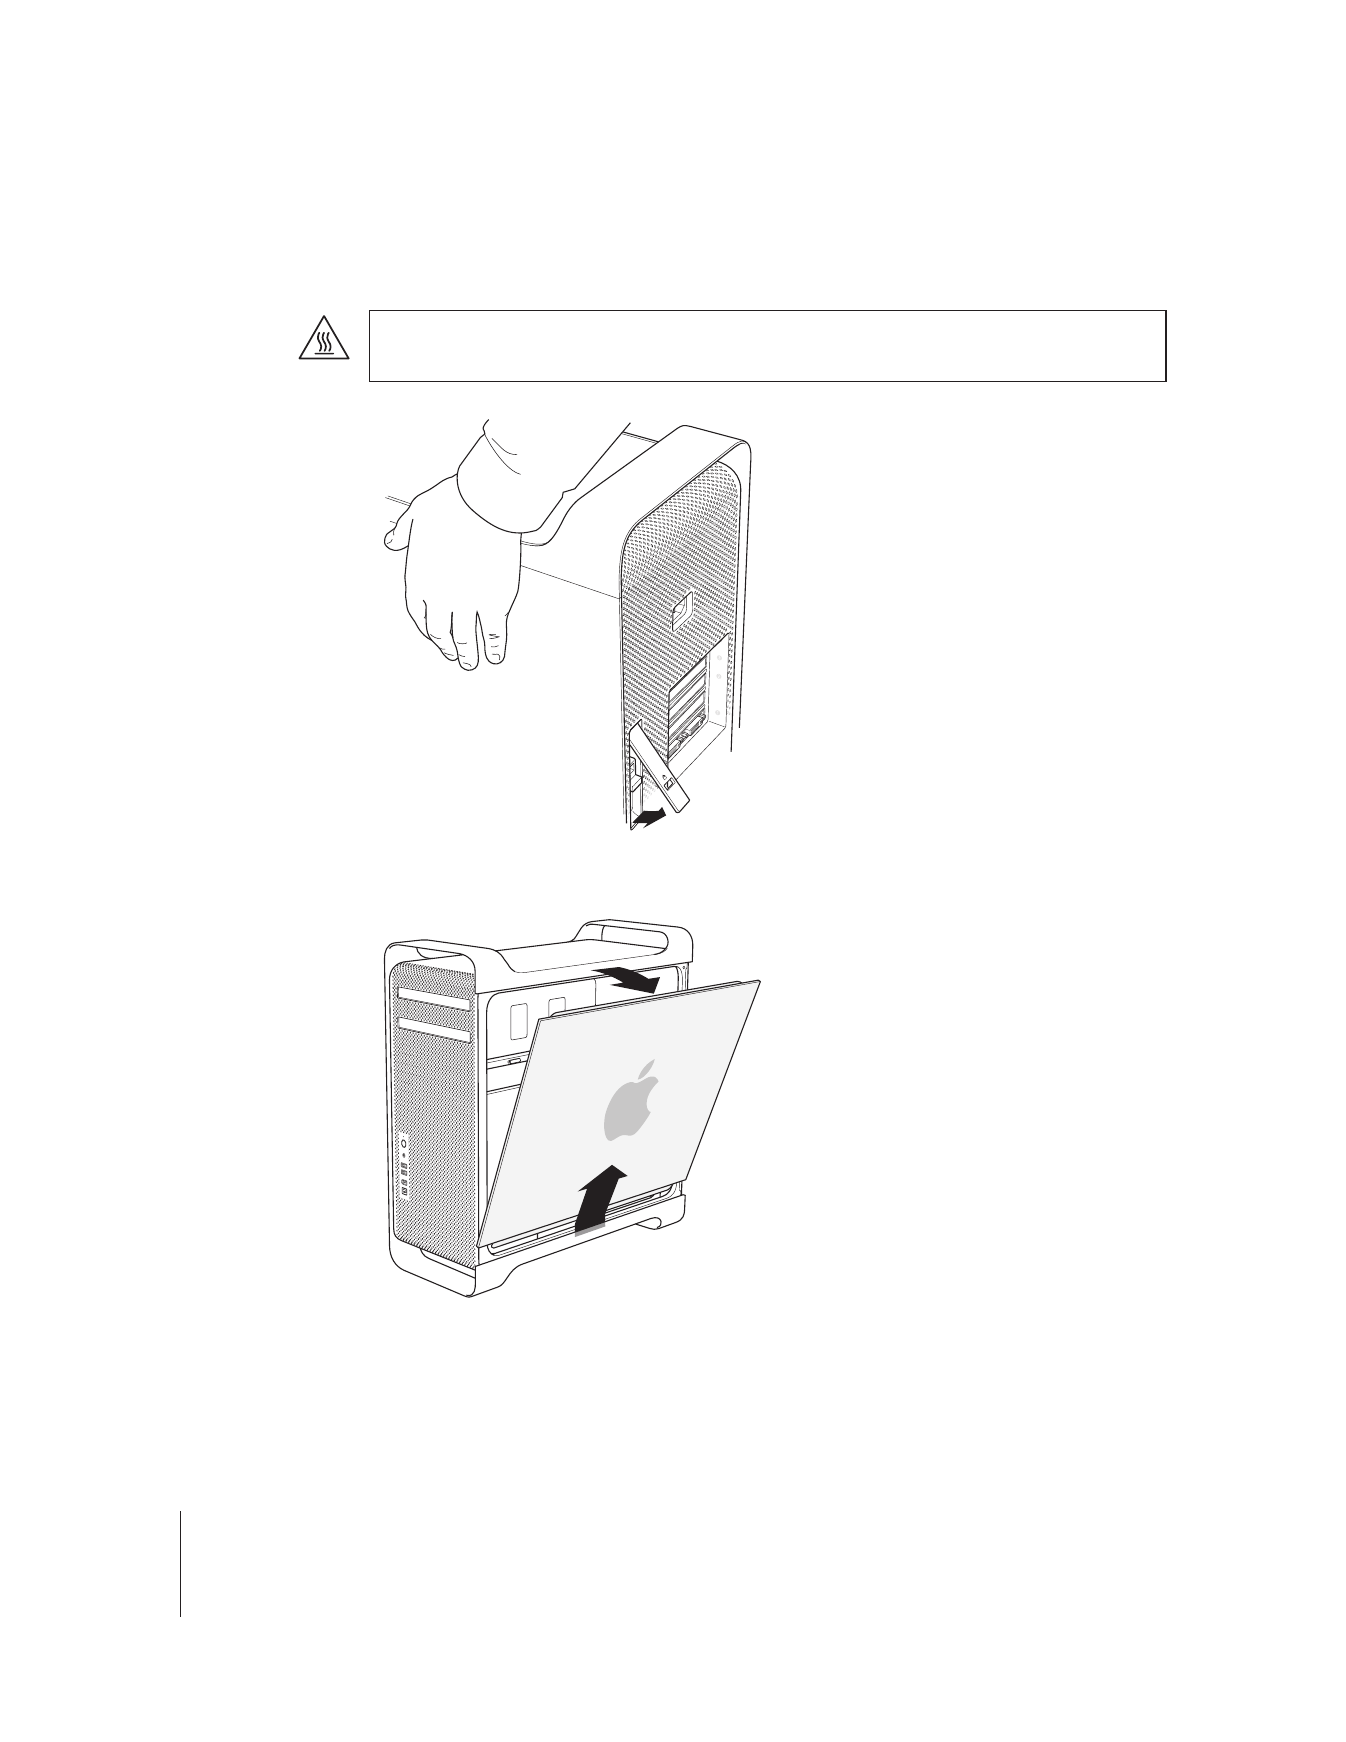
Step 2:
Open the case
1
While holding the side panel, lift the latch on the rear of the case.
2
Remove the side panel and set it aside.
WARNING:
Even after you shut down the Mac Pro, its internal components can be
very hot. Let it cool before you open it.
English
7
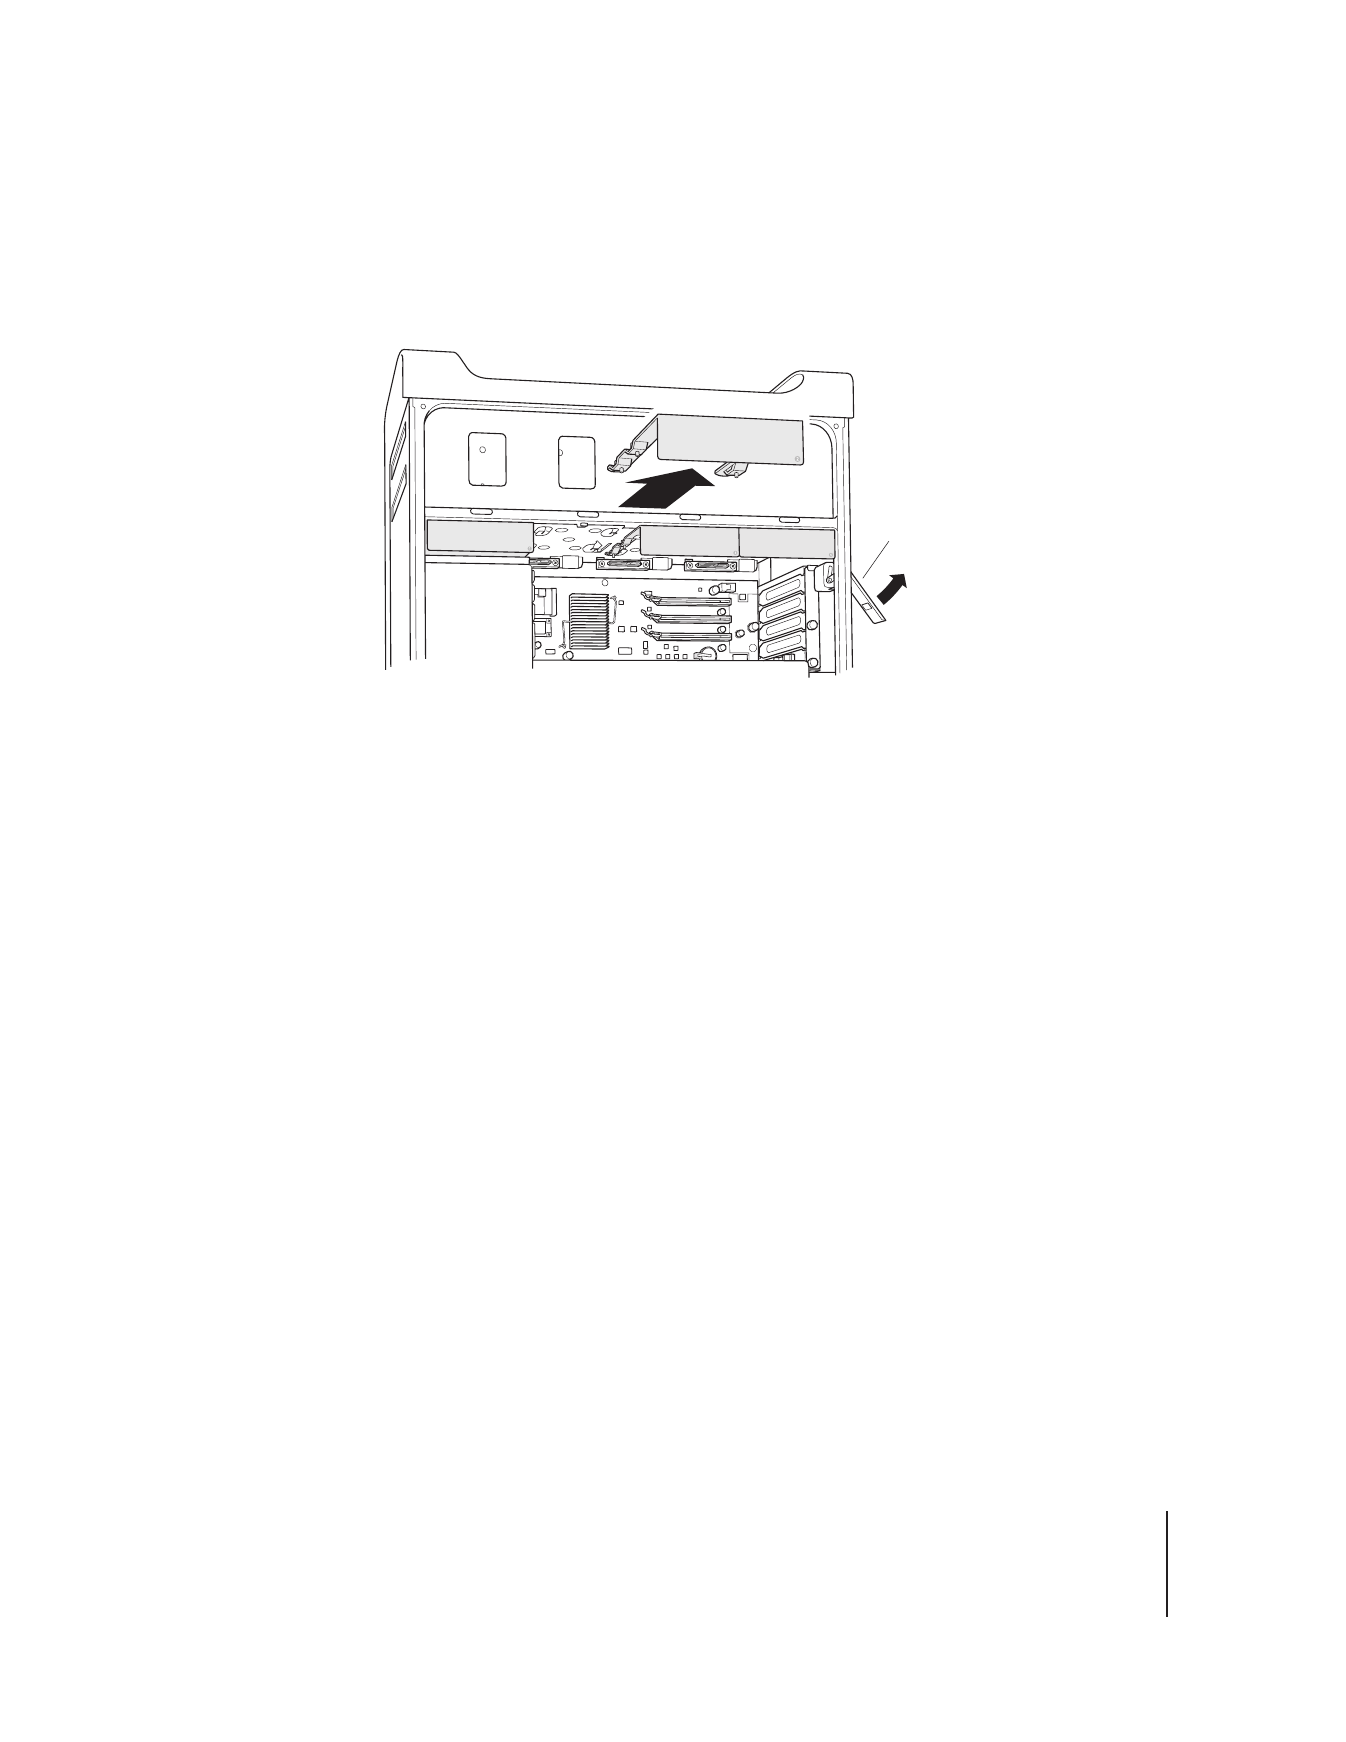
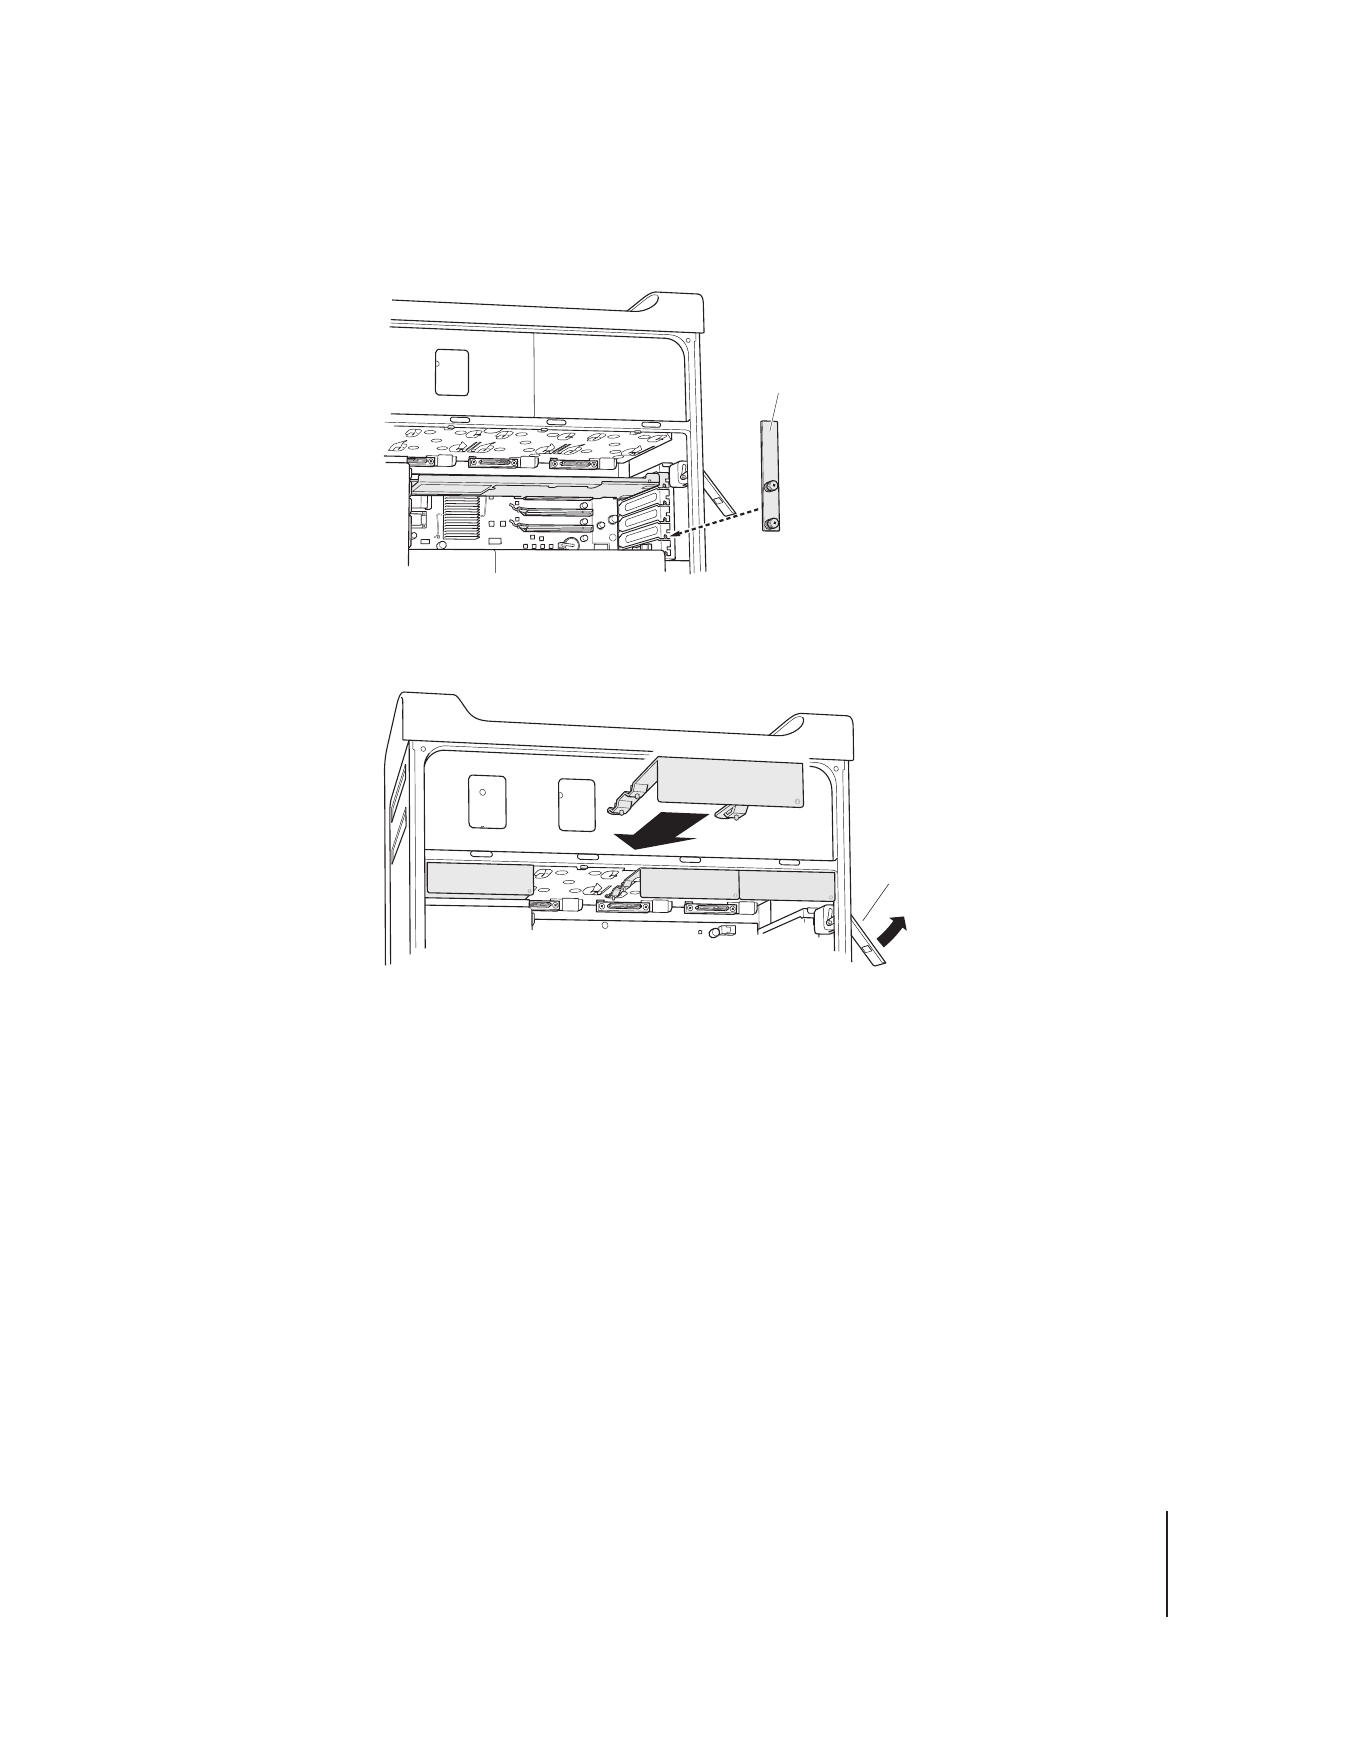
Step 3:
Remove the drive modules
m
Make sure the latch on the back panel is still open, and then pull out all four drive
modules and empty carriers.
Latch
8
English
Step 4:
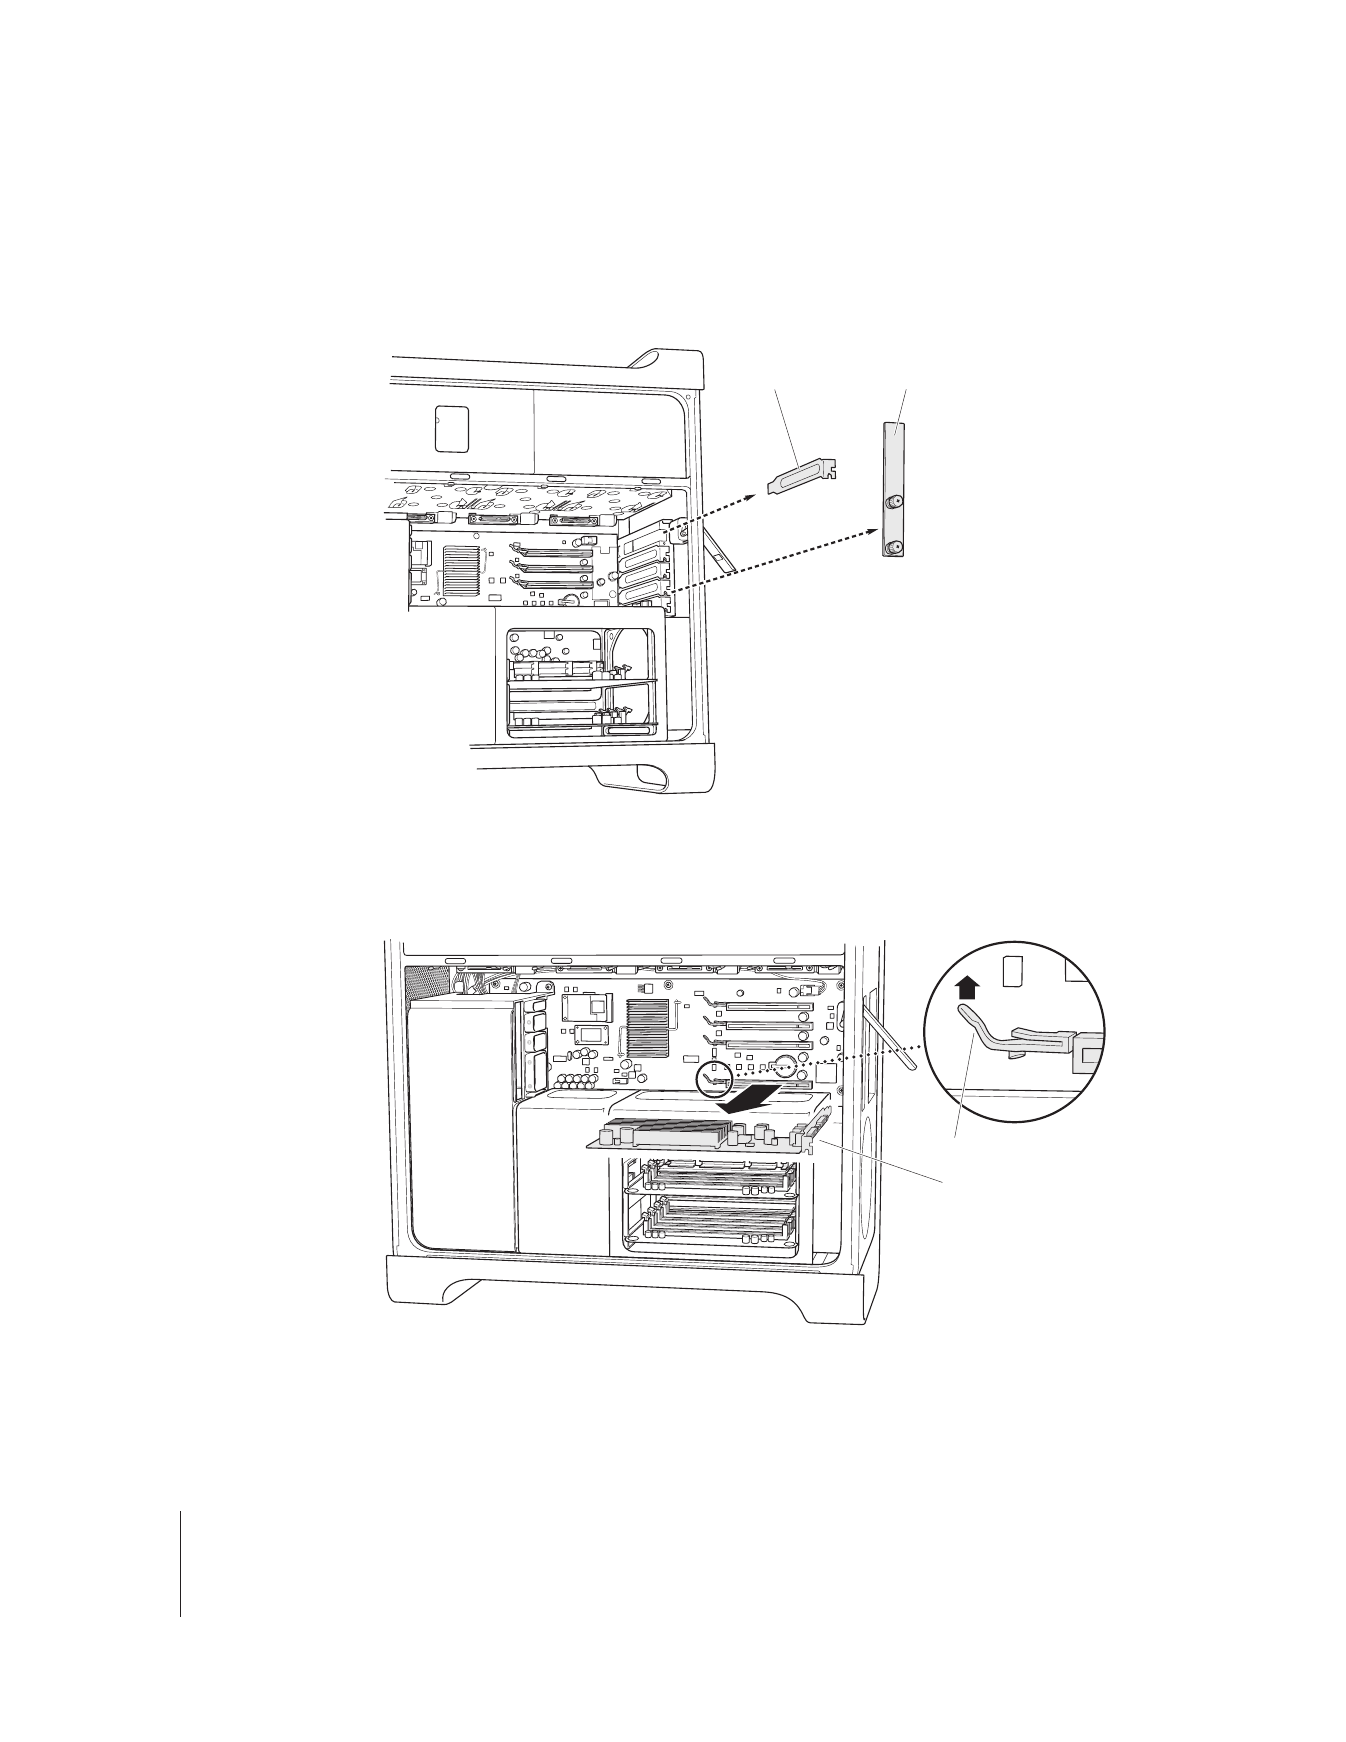
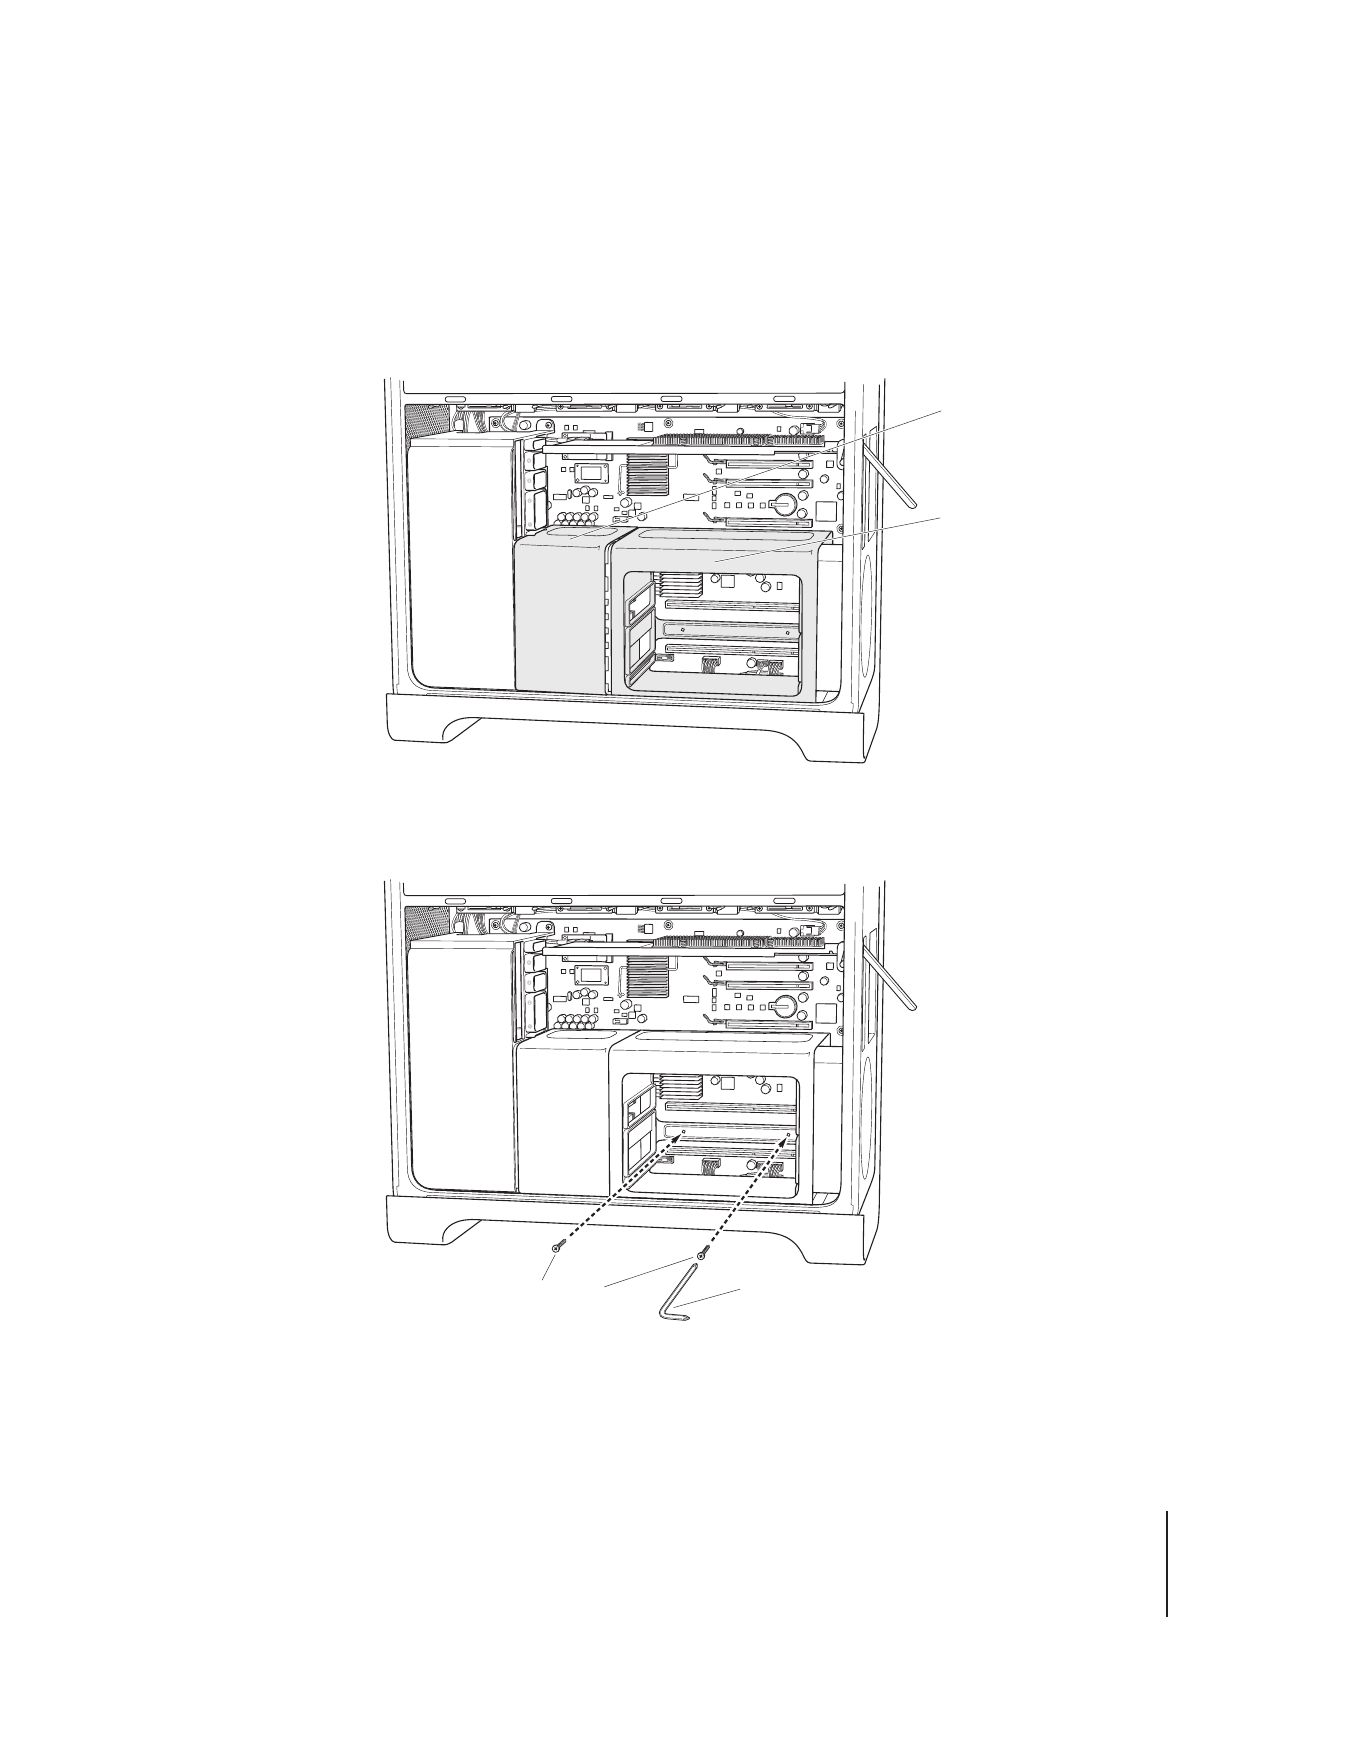
Remove the PCI Express cards
1
Loosen the two thumbscrews on the bracket that holds the PCI Express cards in place
and remove the bracket and the port access cover for slot 4 (the top slot).
2
Disconnect any cables that are connected to the graphics card in slot 1 (the bottom
slot), and then reach behind the card, lift the latch on the card connector, and pull the
card out of the slot.
3
Repeat to remove any other PCI Express cards.
Important:
Note which slot each card comes from so you can return it to the same slot.
PCI bracket
Port access cover
Latch
Graphics card
English
9
Step 5:
Remove the CPU cover
The steps for removing the CPU cover depend on whether you have a quad-core Mac
Pro or an 8-core Mac Pro. For help identifying your computer, see “Which Mac Pro Do
You Have?” on page 3.
If you have an 8-core Mac Pro:
m
Lift up on the back edge of the CPU cover and remove it. Then go on to Step 6 on
page 12.
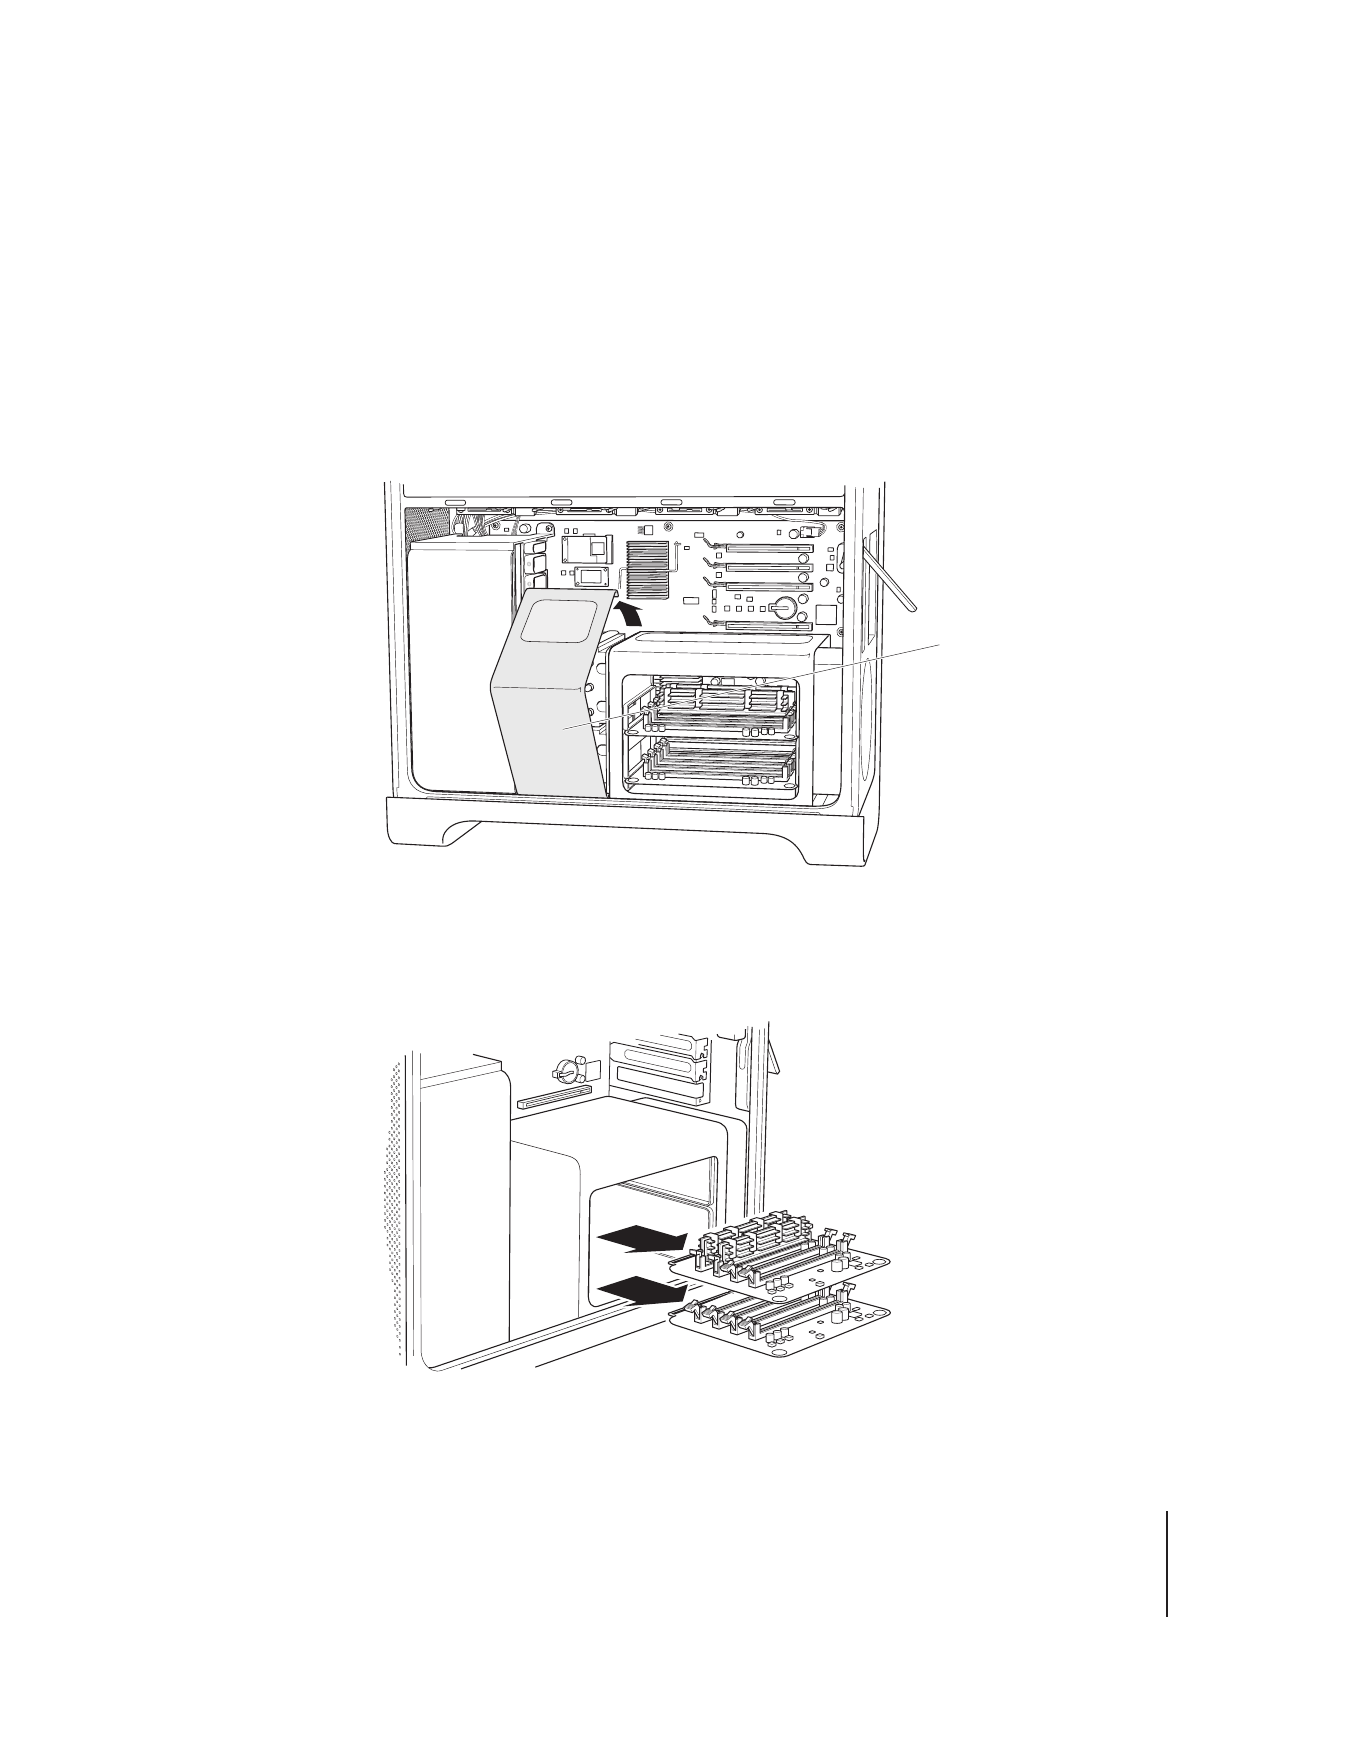
If you have a quad-core Mac Pro:
1
(Quad-core only) Remove the memory cards and set them aside.
Important:
Note which slot each card comes from so you can return it to the same slot.
CPU cover
10
English
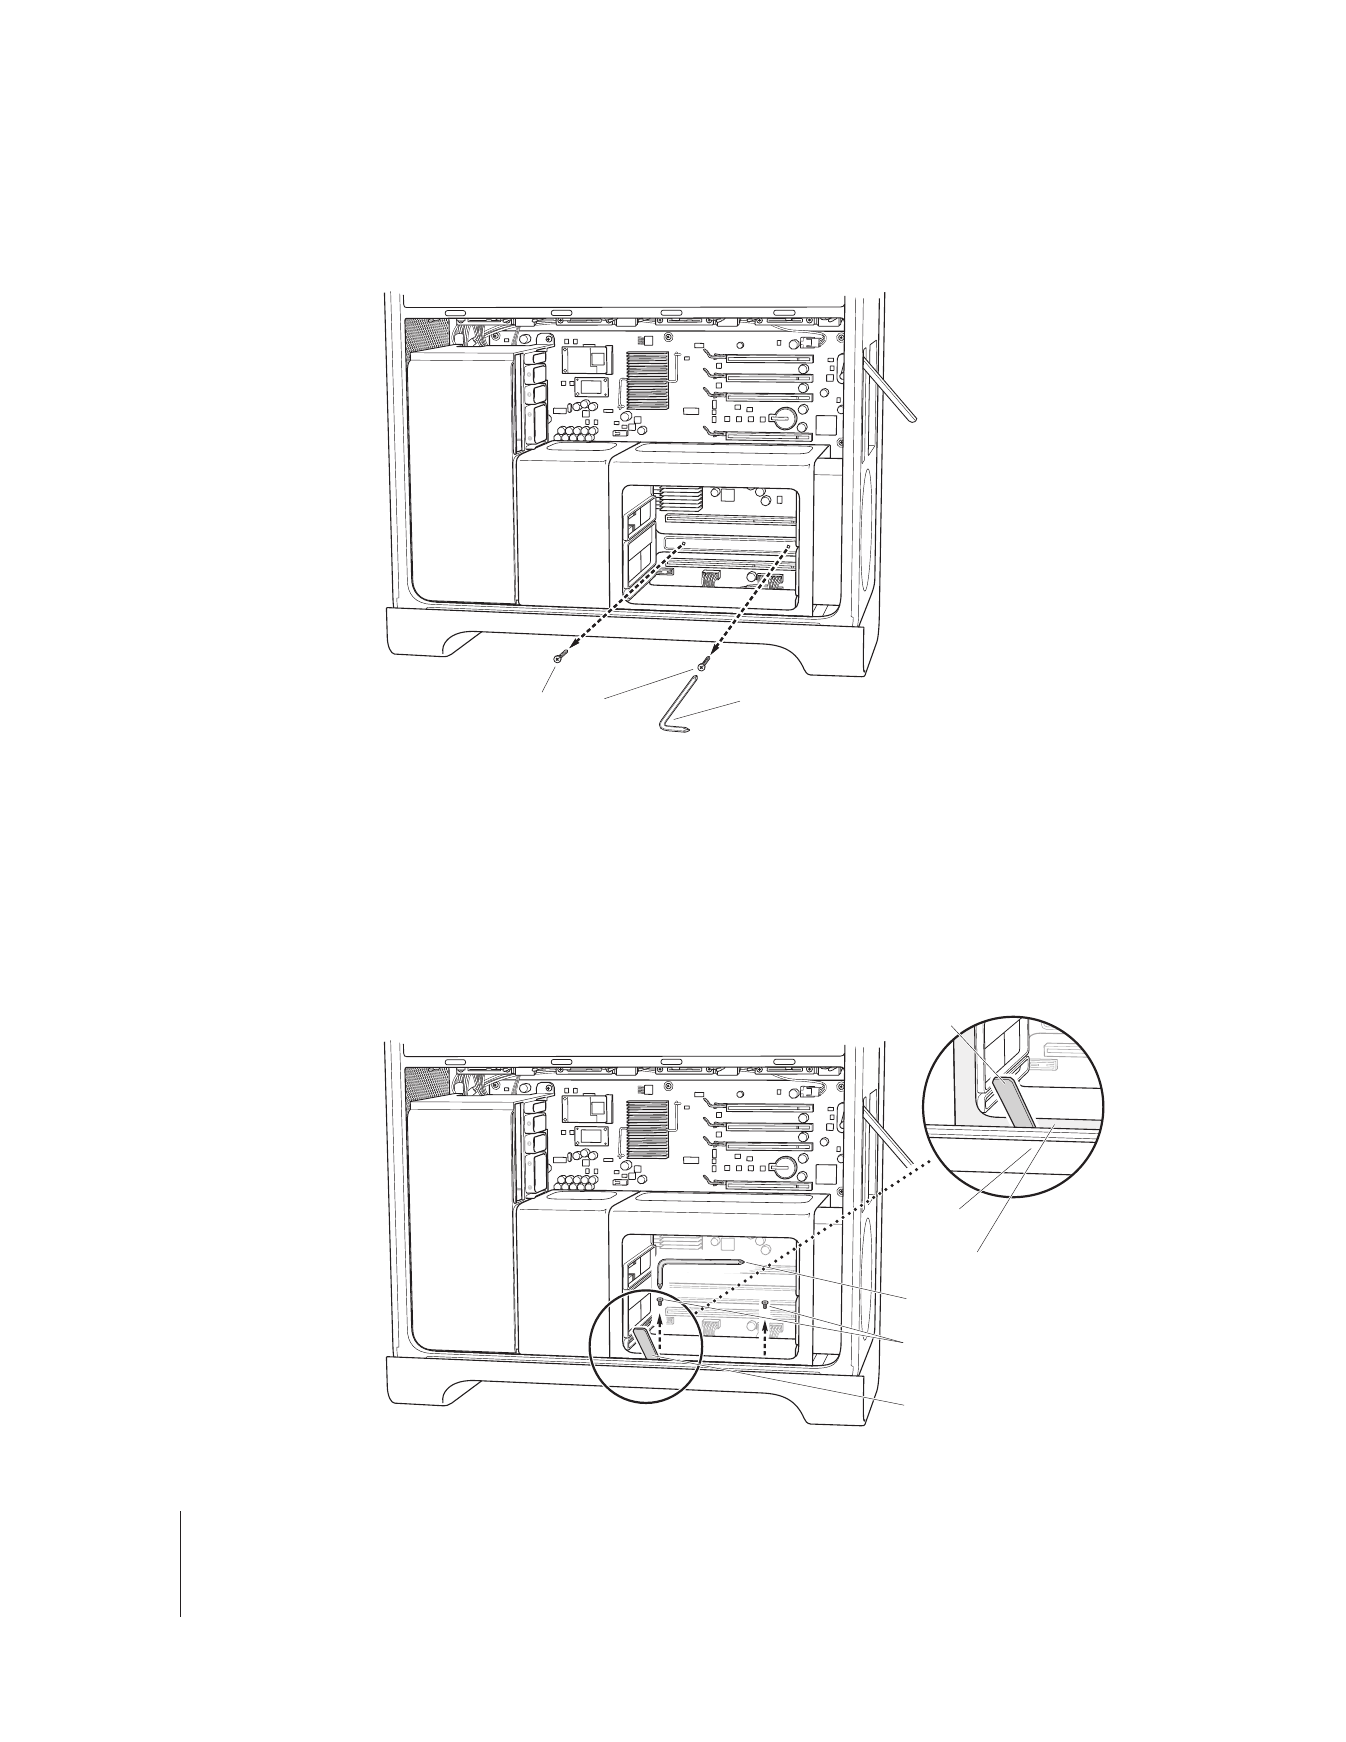
2
(Quad-core only) Remove the two long screws from the back of the DIMM cage.
3
(Quad-core only) Insert the mounting post wrench between the DIMM cage and the
chassis and around the post to keep it from turning, and then use the 90-degree
screwdriver to remove the two screws on the bottom front edge of the DIMM cage.
For easiest removal, use the supplied 90-degree screwdriver and seat the screwdriver
fully into the screw slots. Don’t let the screwdriver slip out of the screw head as you
turn it.
Important:
Don’t pinch any wires between the wrench and the mounting posts.
Long screws (2)
Screwdriver
Screwdriver
DIMM cage
Wrench
Chassis
Short screws (2)
Wrench
English
11
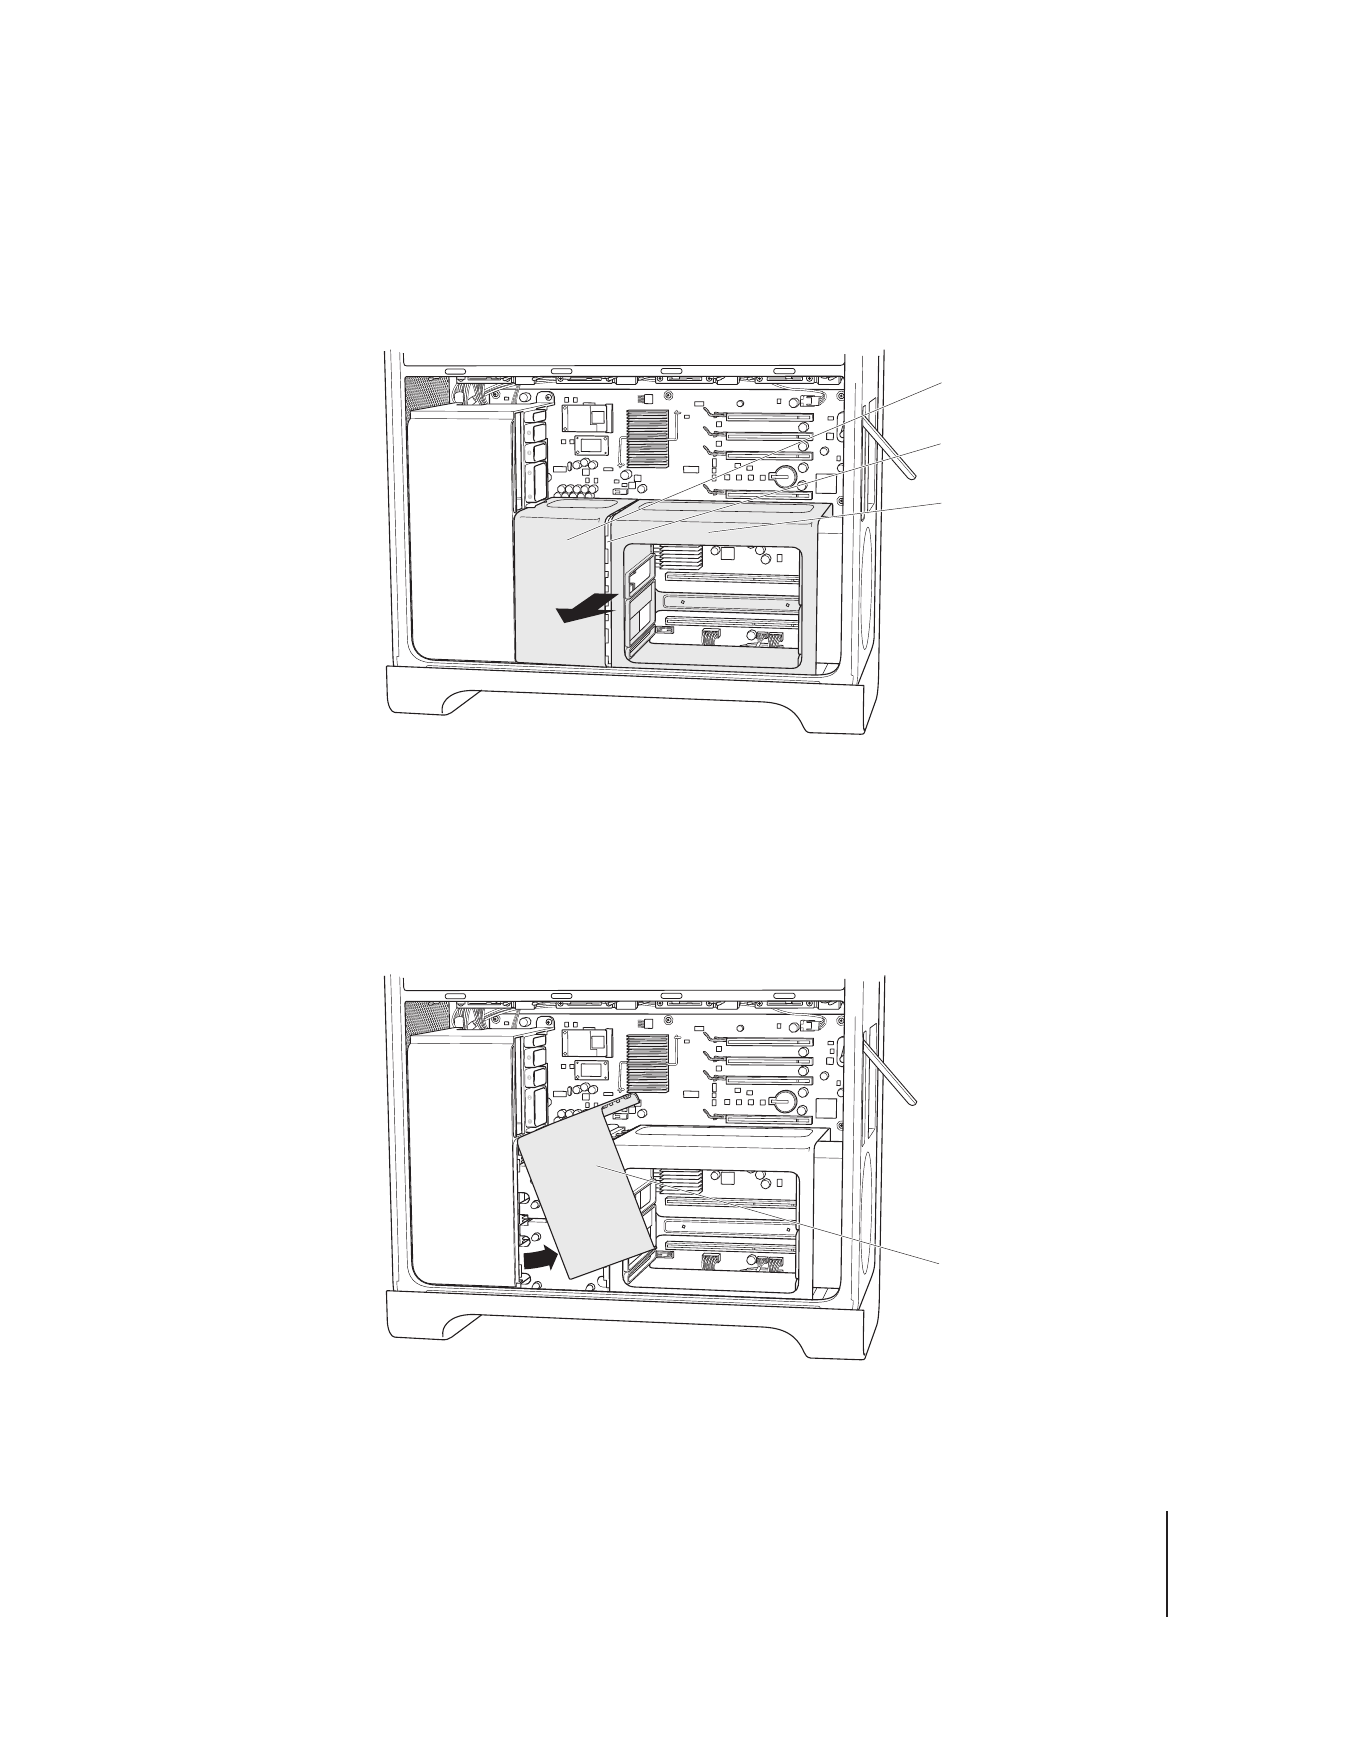
4
(Quad-core only) Without removing the DIMM cage, slide it to the right, toward the
back panel of the computer, to open a gap between the DIMM cage and the CPU
cover.
If you have trouble, try using one hand inside the cage to press the right end of the
cage to the right, toward the back panel of the computer, as you pull out slightly on
the left-front edge of the cage with your other hand. The DIMM cage should separate
slightly from the CPU cover.
5
(Quad-core only) Pull the bottom edge of the CPU cover slightly toward you, rotate it to
the right, and remove the cover.
CPU cover
Gap
DIMM cage
CPU cover
12
English
Step 6:
Remove the fan module
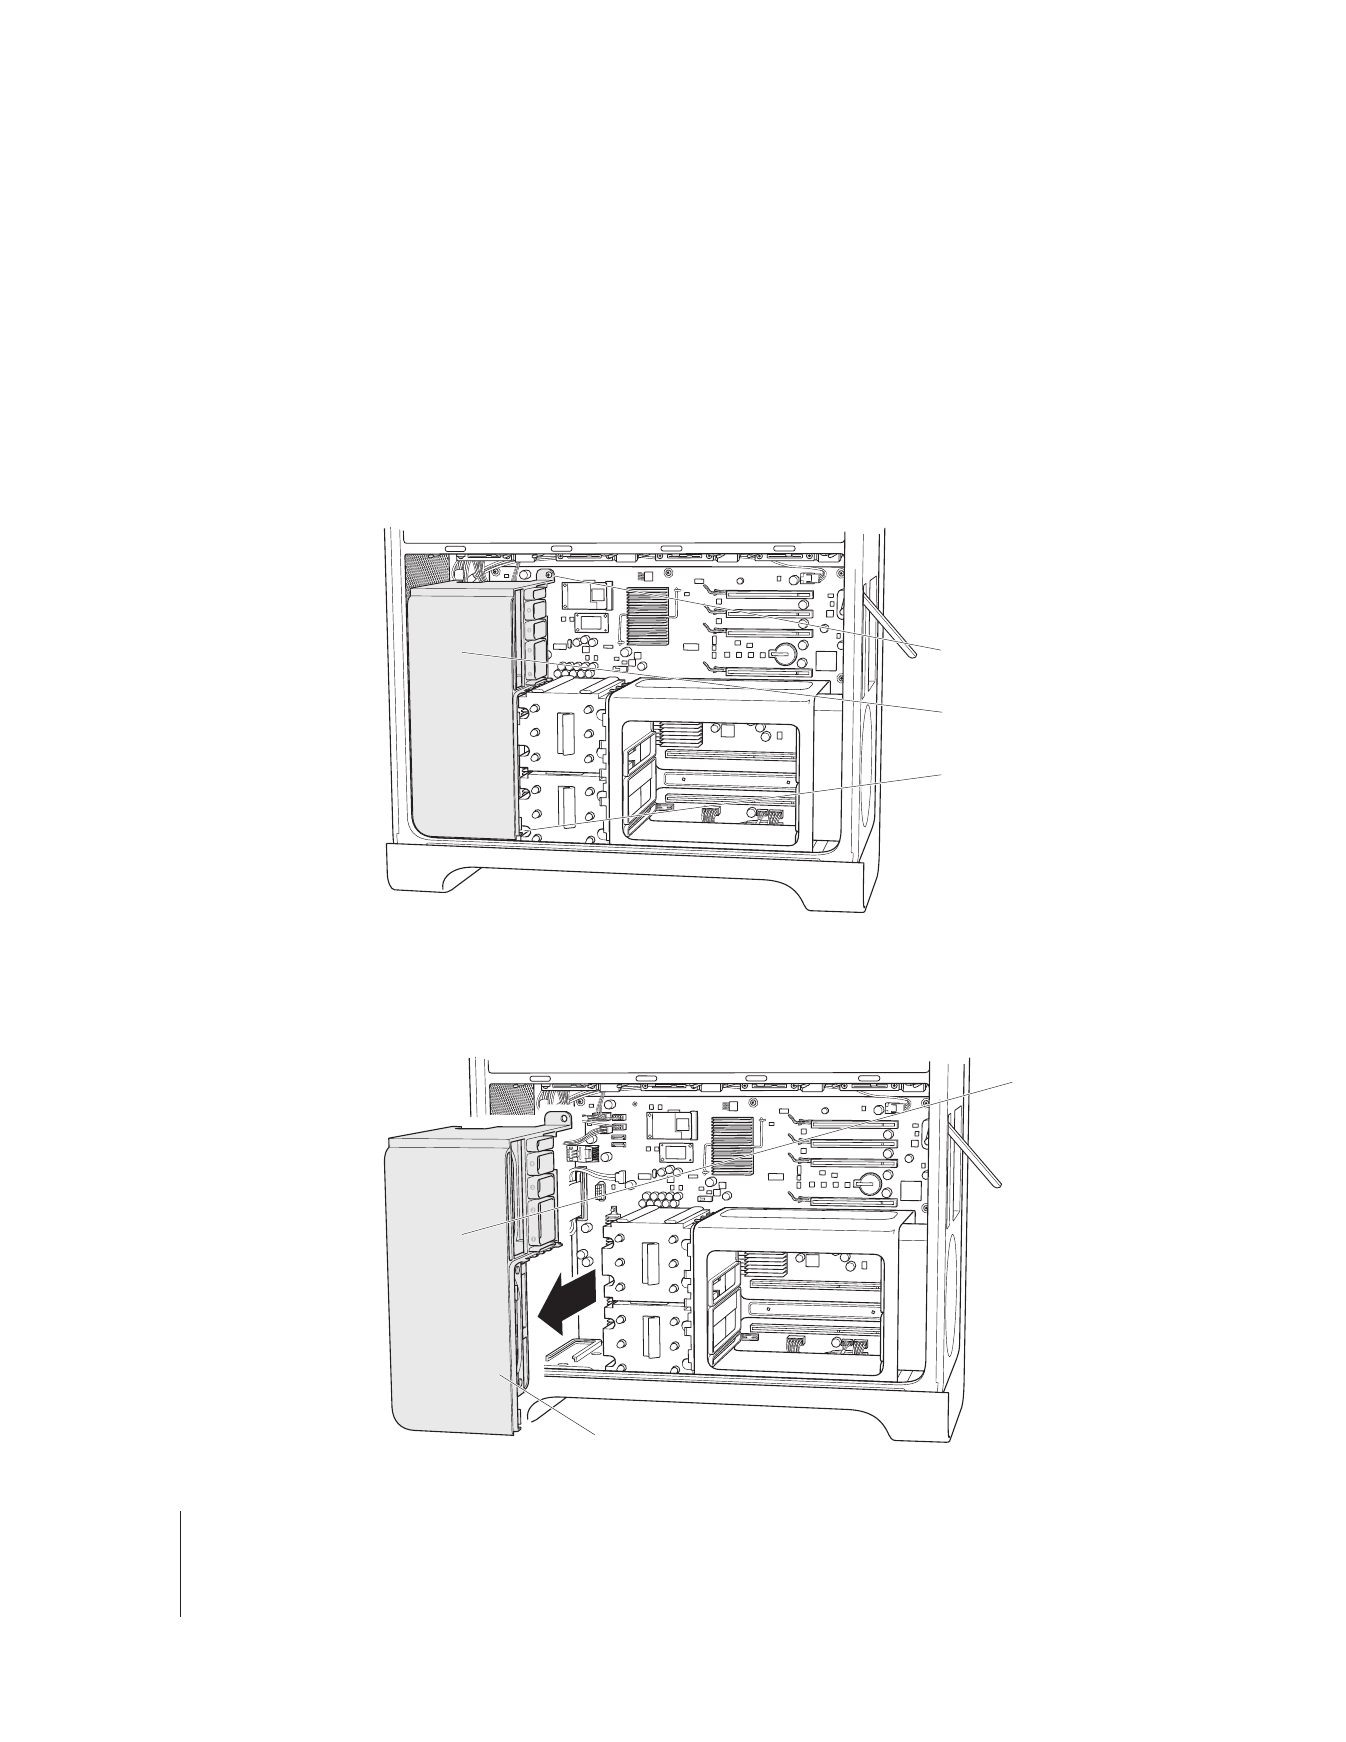
1
Remove the screws that hold the fan module in place.
If you have an 8-core Mac Pro:
There are two screws: one at the upper-right rear corner and a second at the lower-
right front corner.
If you have a quad-core Mac Pro:
There is a single screw at the upper-right rear corner of the module that secures it to
the main logic board.
2
Slide the fan module out of the chassis. If you have difficulty, try pulling as low as
possible on the module, wiggling the module as you pull. It may help to lay the
computer on its side so you are pulling the module upward.
Fan module
Fan module screw
Second screw
(not present on
quad-core Mac Pro)
Fan module
Pull from here.
English
13
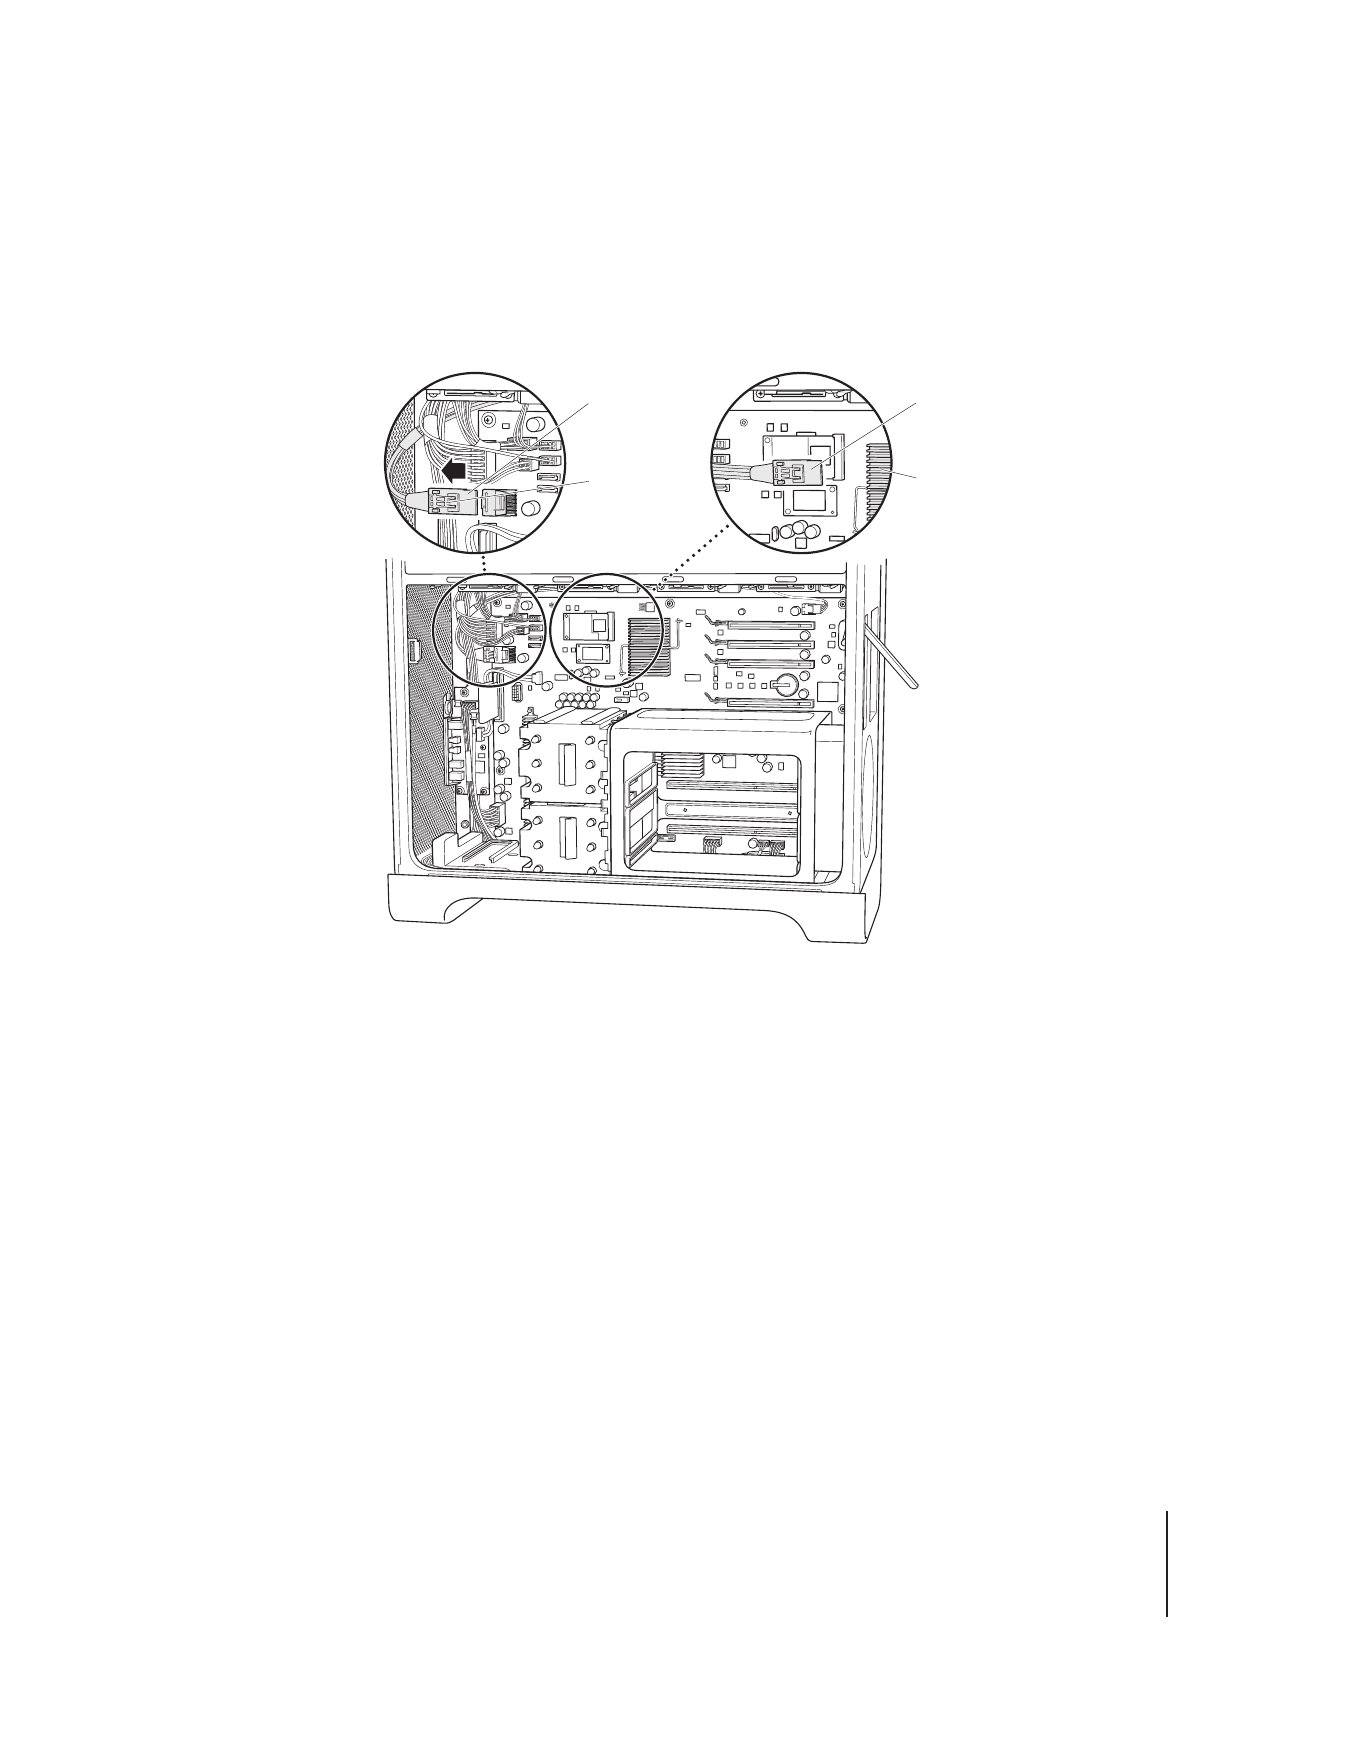
Step 7:
Disconnect and reroute the iPass cable
1
Press to release the connector lock on the iPass cable and unplug the cable from the
main logic board.
2
If necessary, disentangle the iPass cable from other cables running through the same
area so that the loose end of the iPass cable extends toward the PCI connectors as far
as possible.
You may need to disconnect other cables to reroute the iPass cable so its connector
extends far enough toward the PCI slots. When you can get the iPass cable connector
within approximately one and one-quarter inches of the heatsink shown in the
illustration, you should have enough slack to connect it to the RAID card in step 9.
Be sure to reconnect any other cables you disconnect while rerouting the iPass cable.
iPass cable
Connector
lock
Before rerouting
iPass cable
Heatsink
After rerouting
14
English
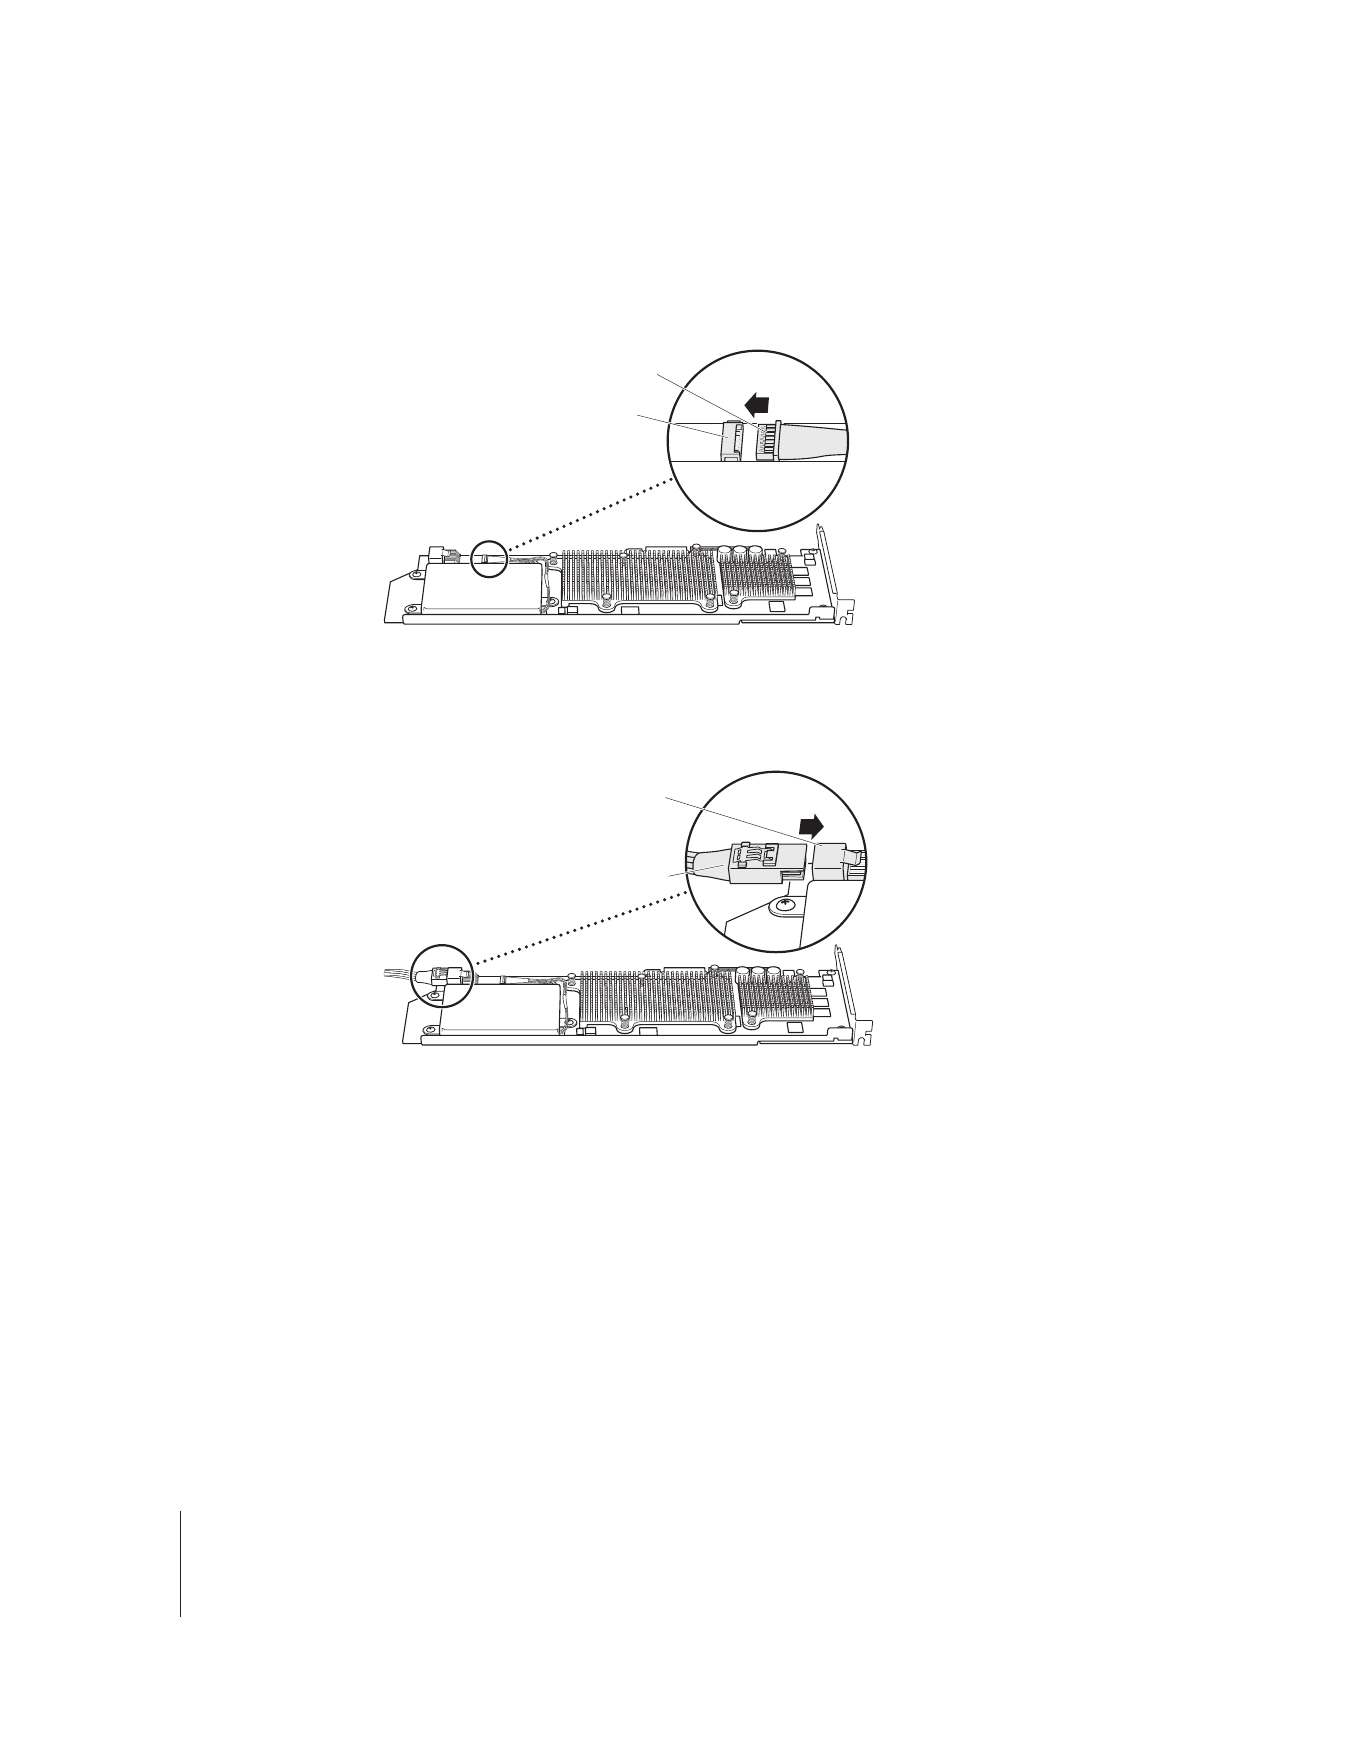
Step 8:
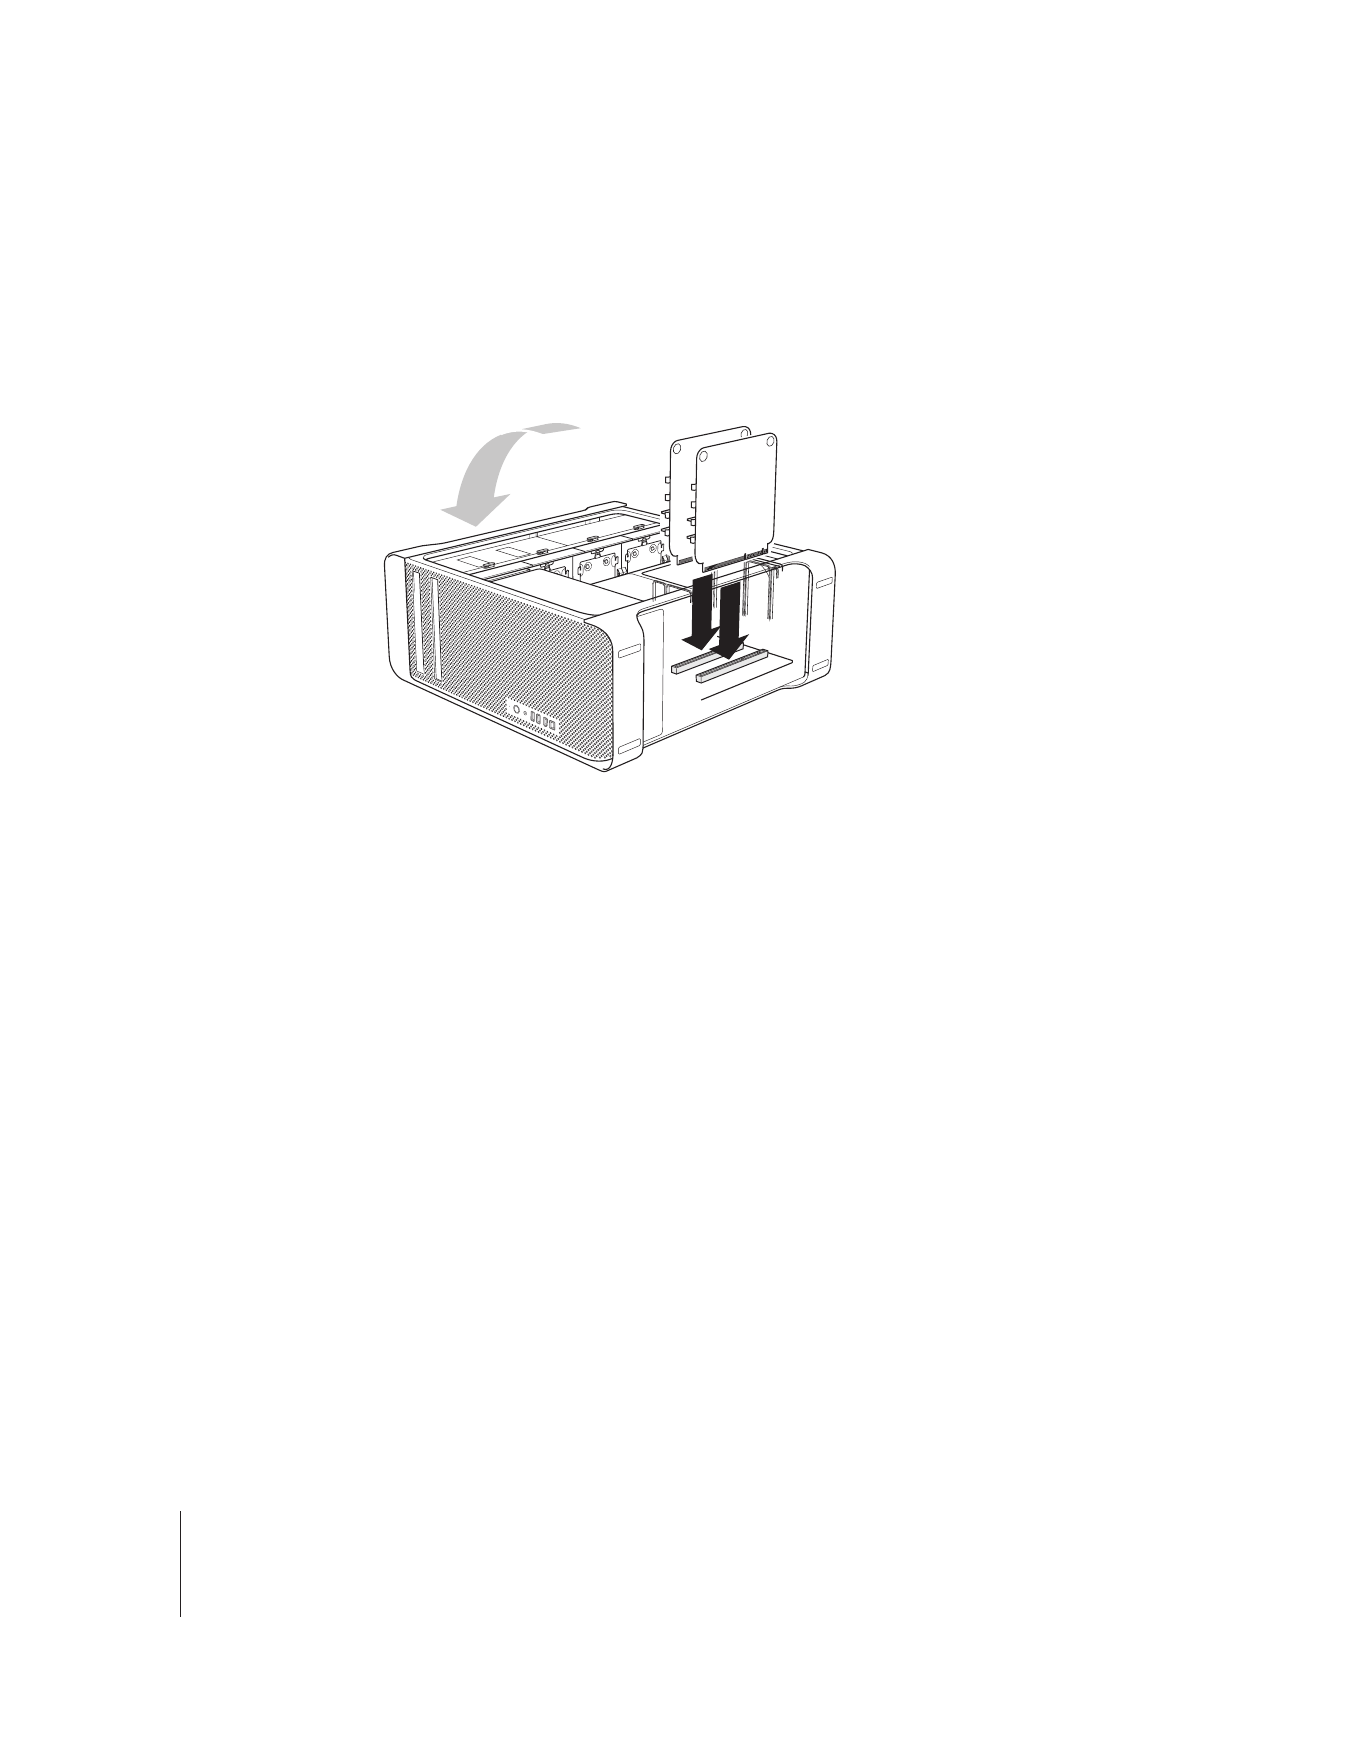
Connect the RAID battery
m
On the RAID card, connect the small battery cable to the connector next to the battery
on the card.
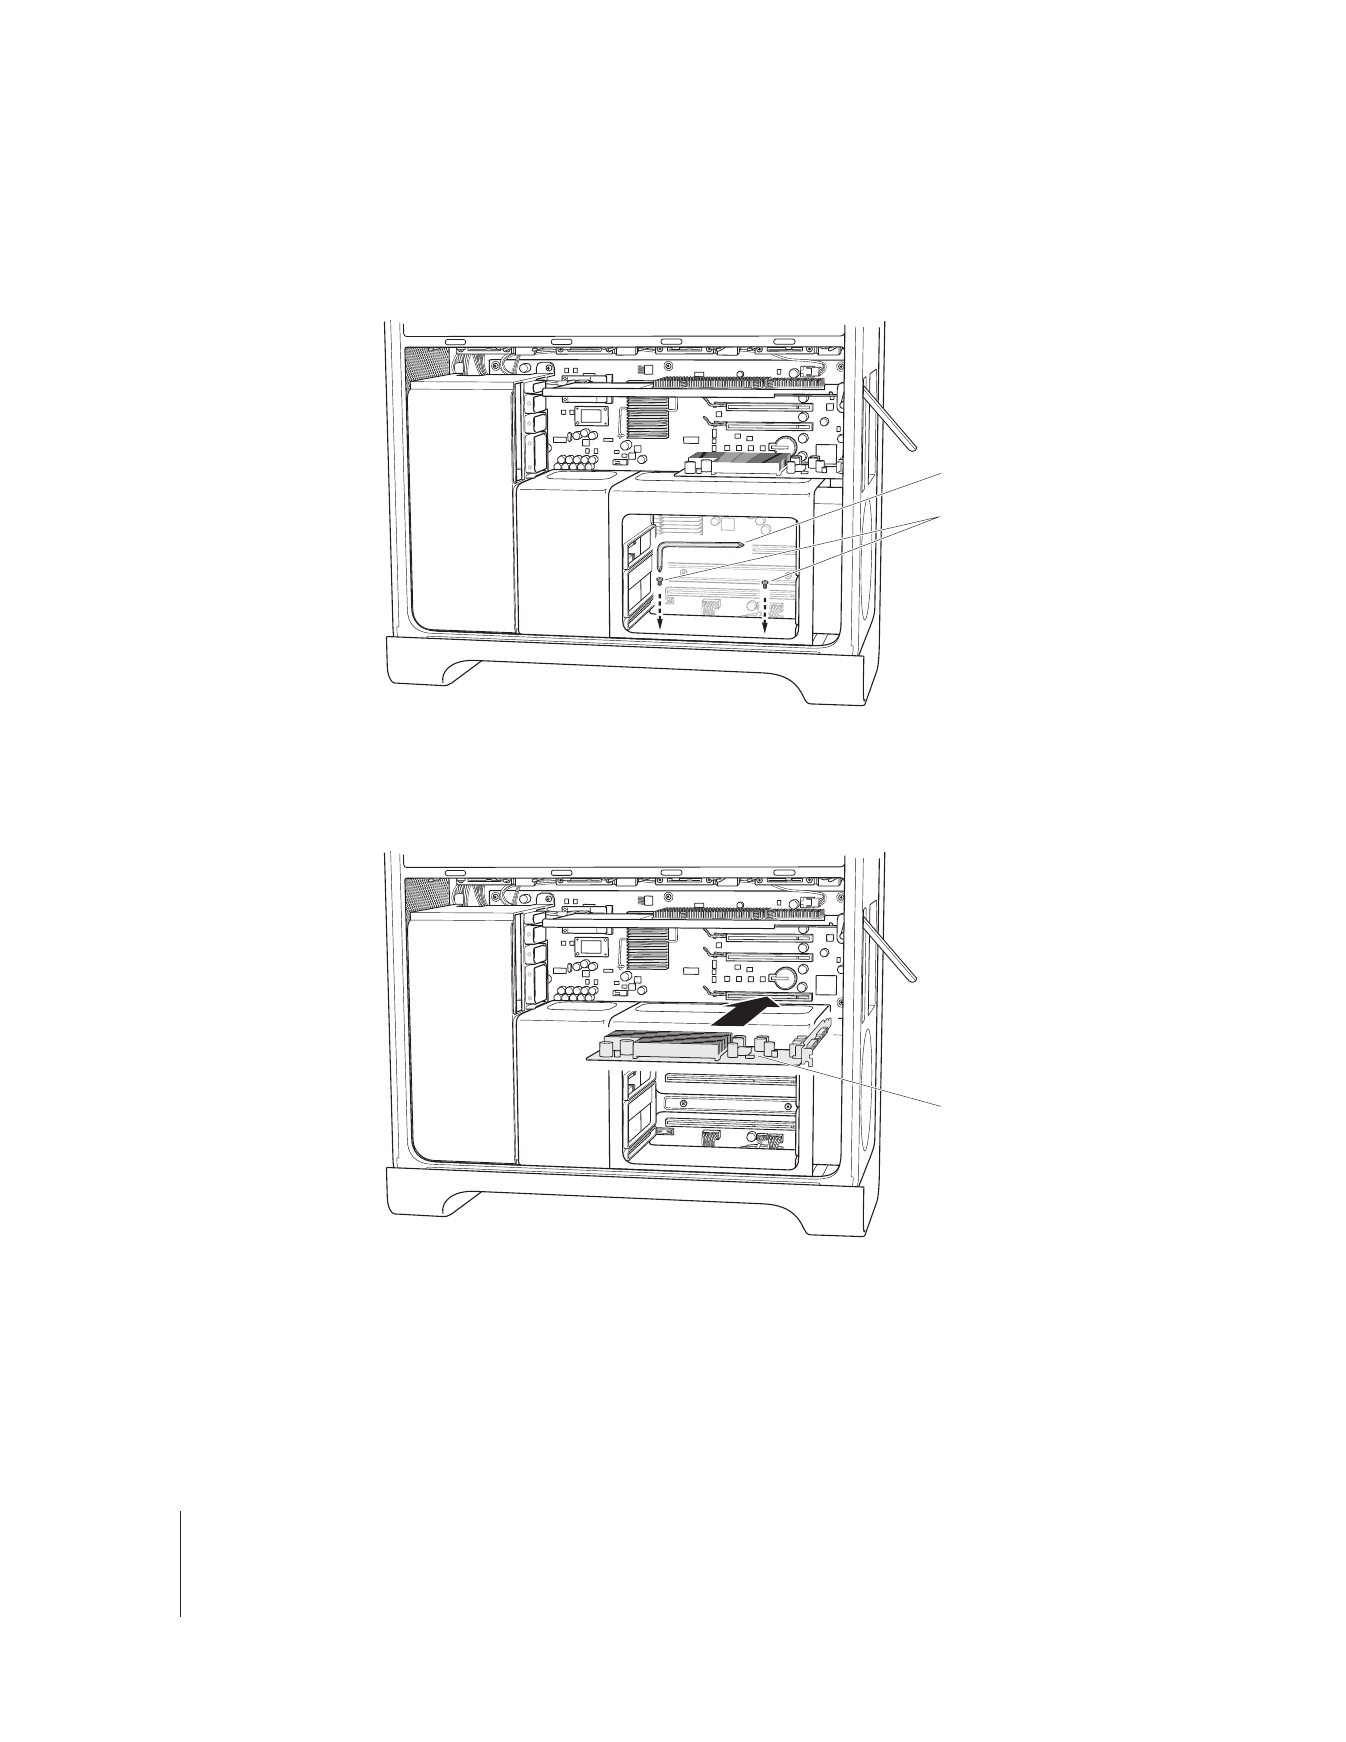
Step 9:
Connect the iPass cable and install the RAID card
1
While holding the RAID card inside the chassis, connect the iPass cable to the
connector on the card. You should hear a click when the connector is fully seated.
2
Slide the RAID card into the top PCI Express slot (slot 4). Check that the card is fully
seated in the connector.
Important:
The Mac Pro RAID Card must be installed in PCI Express slot 4, the top slot.
If the iPass cable prevents you from installing the card, disconnect the cable and
reroute it to provide more slack.
Battery cable
Connector
on card
Connector
on card
iPass cable
English
15
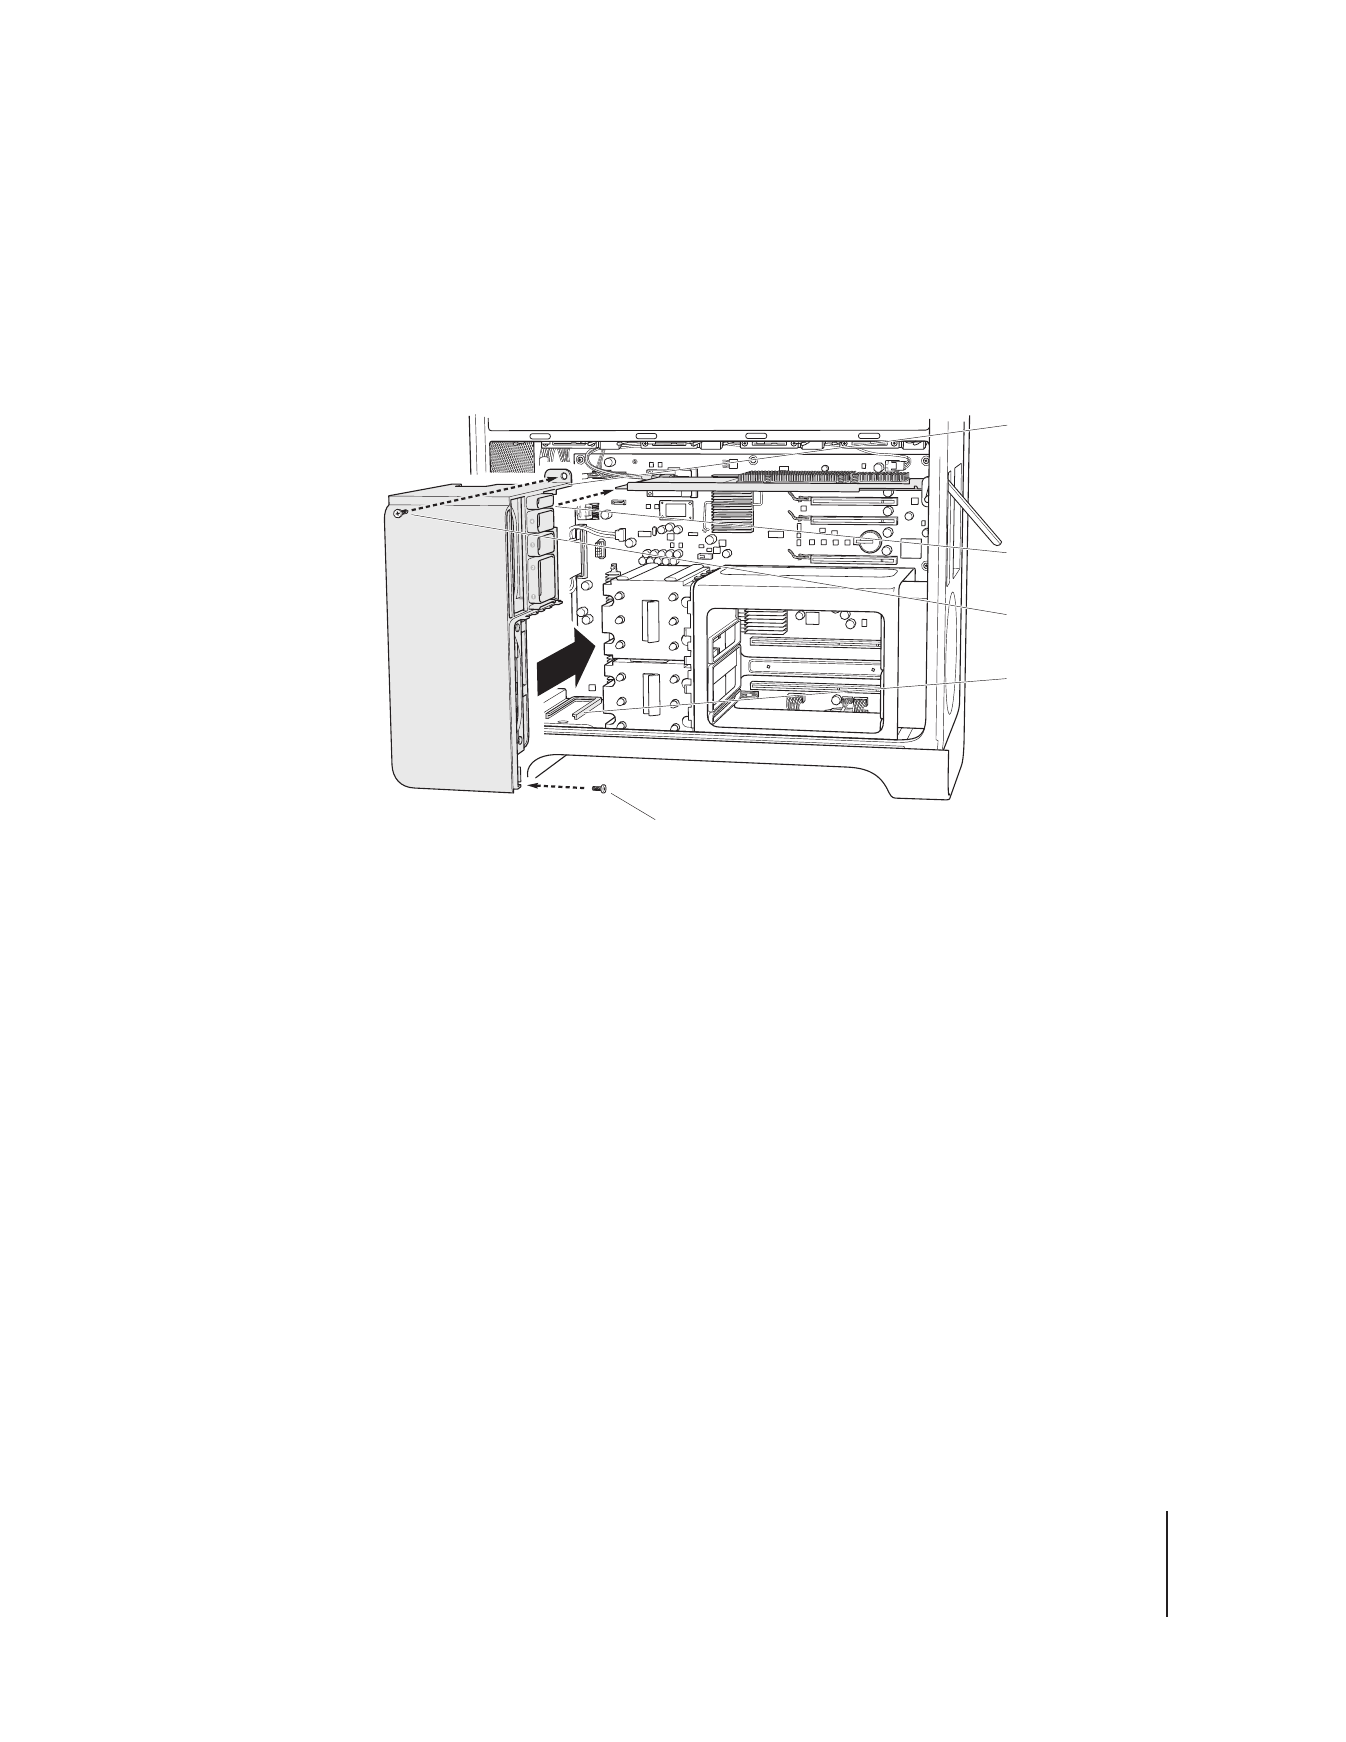
Step 10:
Install the fan module
1
Align the guide on the bottom of the fan module with the fan module guide on the
floor of the chassis and slide the fan module into the chassis.
Make sure the iPass cable goes behind the module, below the mounting arm, and that
the end of the RAID card slides into card guide 4 on the fan module.
2
Install the screws that secure the fan module.
If you have an 8-core Mac Pro:
There are two screws: one at the upper-right rear corner and a second at the lower-
right front corner.
If you have a quad-core Mac Pro:
There is a single screw at the upper-right rear corner of the module that secures it to
the main logic board.
Screw
Card guide 4
Mounting arm
Fan module
guide
Second screw (not present on quad-core Mac Pro)
16
English
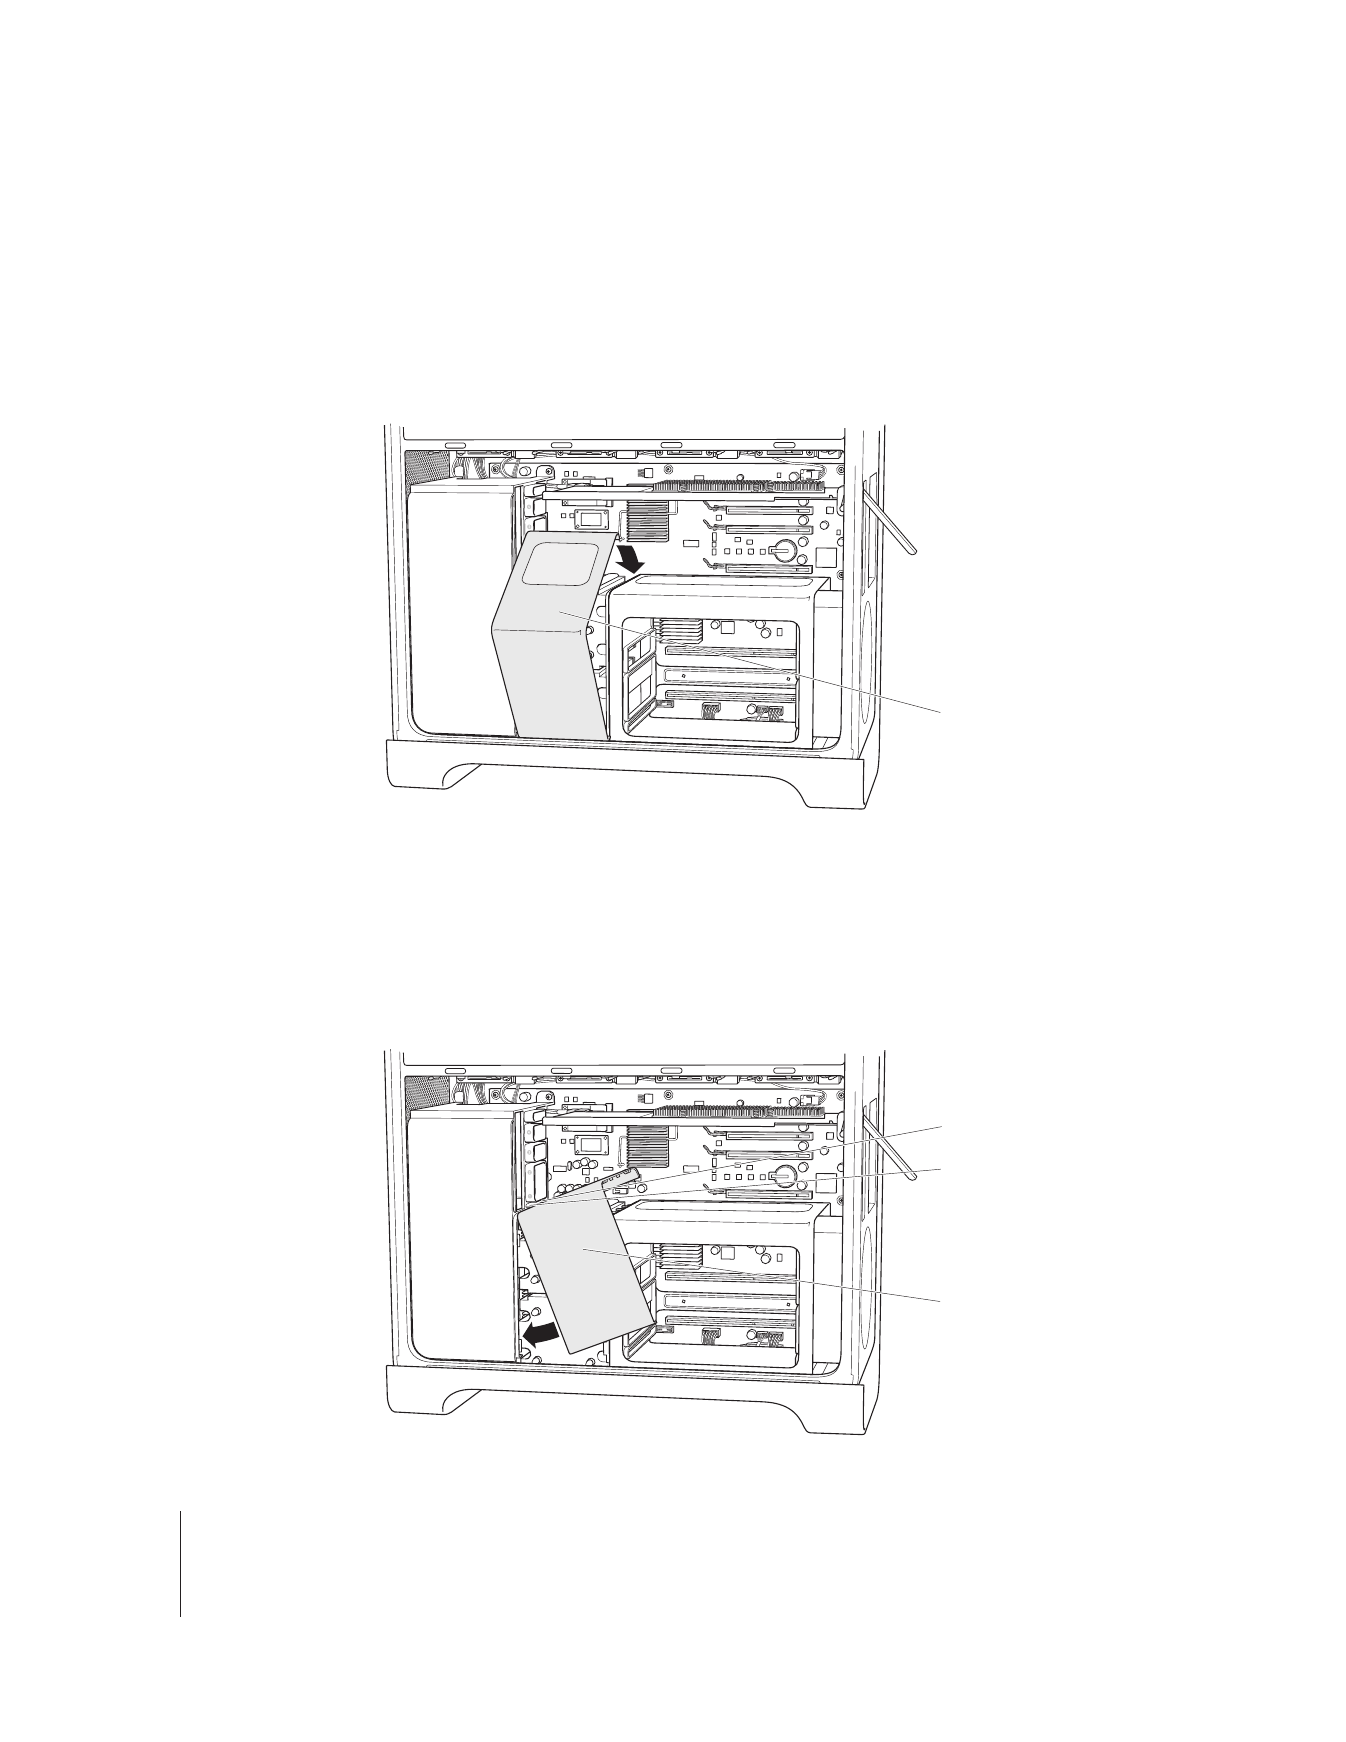
Step 11:
Install the CPU cover
The steps required depend on whether you have a quad-core or an 8-core Mac Pro.
If you have an 8-core Mac Pro:
m
Position the bottom front edge of the cover and then rotate the top back until the
magnets snap it into place. Then go on to Step 12 on page 18.
If you have a quad-core Mac Pro:
1
With the front face of the cover rotated to overlap the front of the DIMM cage, insert
the top-left edge of the cover under the retainer on the fan module just below PCI card
support slot 1 and then rotate the cover into place.
Make sure the edge of the cover is not in the support slot for PCI slot 1 on the fan
module.
CPU cover
CPU cover
Bottom plastic retainer
Card guide 1
English
17
2
(Quad-core only) Slide the DIMM cage to the right, toward the back panel, and snap
the CPU cover between the DIMM cage and the fan module. Jiggle the DIMM cage and
CPU cover left and right as you seat the CPU cover so it is flush with the front face of
the fan module and the top and front faces of the DIMM cage.
3
(Quad-core only) Install the two long screws at the back of the DIMM cage. Don’t
overtighten the screws; snug is adequate.
CPU cover
DIMM cage
Long screws (2)
Screwdriver
18
English
4
(Quad-core only) Install the two replacement screws (provided in the kit) in the bottom
front edge of the DIMM cage. Don’t overtighten the screws; snug is adequate.
Step 12:
Install the graphics card and any other PCI Express cards
1
Install the graphics card in slot 1, the bottom slot nearest the DIMM cage. If you had to
disconnect a cable from the card to remove it, reconnect the cable.
2
Install any other PCI Express cards that you removed.
Screwdriver
Replacement
screws (2)
Graphics card
English
19
3
Replace the bracket that holds the cards in place.
Step 13:
Replace the drive modules
m
Make sure the rear latch is up, and then slide in the drive modules and blanks.
PCI bracket
Latch
20
English
Step 14:
(Quad-core only) Replace the memory cards
m
Slide the memory cards back into the DIMM cage.
You may find this easier if you lay the computer on its side.
Important:
Be sure you return each memory card to the same slot you removed it
from.
Step 15:
Replace the side panel
1
Insert the lower edge of the side panel into the chassis and rotate the top closed.
2
Close the latch.
Step 16:
Reconnect external cables and the power cord
You’re now ready to use the RAID Utility application to set up RAID volumes.